Navigate the Partner Console
Find your way around the Partner Console so you know where to go at each stage of a partner relationship.
Overview
The Partner Console lives under Partners in the Fours Console, and its rail covers two kinds of work:
- Settings, the last item in the rail, where you configure your partner program.
- Everything above it, where you recruit, onboard, and collaborate with partners every day.
This guide gives you a tour of both. For detailed instructions, follow the how-to guides linked from each section.
The Partners Rail
The main areas under Partners are reached from a rail on the left, split into two groups, with Settings below them.
The top group opens with Dashboard, then follows the partner lifecycle — the stages a relationship passes through:
| Item | What it’s for |
|---|---|
| Dashboard | Your whole program at a glance: what needs attention today, how the program is performing, how each partner manager’s book is doing, and where your partners are. |
| All Partners | Your directory of partner records. |
| Applications | Every partner application you’ve received, whether pending, accepted, declined, or expired — and, for Admins, requests to join your organization. |
| Partner Discovery | Candidates to recruit, from AI recommendations or your CRM. |
| Journeys | Onboarding playbooks and the partners working through them. |
| Partner Co-Sells | Shared sales opportunities in both directions. |
The second group is headed Workspace — the tools you use across partners rather than at one stage:
| Item | What it’s for |
|---|---|
| Tasks | Follow-ups and action items. |
| Partner Files | The shared document library. |
| Training | Courses, progress, and certificates. |
| Events | Webinars, training sessions, and partner events, with RSVPs. |
| Broadcasts | One message sent to every partner’s Slack channel at once. |
Below the Workspace group, Settings (the gear icon) opens your partner program’s configuration — your partnership profile, brand, login page, sign-up forms, deal registration form, commissions, journey templates, file sharing defaults, tiers, and more — with its own list of sections. If you collapse that list to hide it, point at Settings in the rail instead: a panel lists the same sections, with Expand menu at the top to bring the list back. See Set Up Your Partner Program.
Opening Partners lands on All Partners, even though Dashboard sits above it. Selecting a rail item swaps the main column — it doesn’t navigate away — so the rail stays put as you move between sections. You can collapse it to an icon-only strip when you want the width, and it stays collapsed the next time you open Partners in the same browser. The rail stays on screen at every window width; on a narrow window, collapse it to the icon strip to give the page more room.
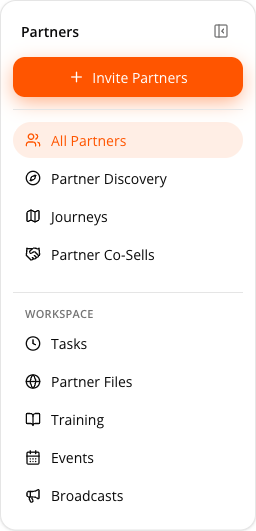
The Fours Console’s main sidebar, at the far left of the screen, opens and closes only with the button on its right edge, which appears while you point at the sidebar. It also remembers whether you left it open.
What You See Depends on Your Organization
Not everyone sees all twelve items.
- Dashboard, Applications, Partner Discovery, Journeys, and Broadcasts are seller-side tools. If your organization joined Fours as a partner rather than running its own partner program, these five are hidden, because there is no program of yours to measure, and nobody applying to you, for you to discover, to onboard, or to broadcast to.
- Partner Co-Sells and Training come on with Partner Management. Fours can switch either one off for an organization, and its item is then hidden. The Service Quota card under Settings → Organization lists them under PRM, as Co-Sell and Training, with whether each is enabled for you.
- Settings appears for seller, reseller, and partner organizations.
- If your organization joined as a partner and has a single partnership, opening Partners takes you straight to that partnership’s record. The exception is an invitation from another company that is still waiting for your answer: then the list stays open, so you can answer it under Pending invitations. The Home button at the top left always opens the list.
If an item named in this guide isn’t in your rail, that’s why. Check with your Fours admin rather than hunting for it.
Set Up Your Partner Program
Before inviting partners, spend a few minutes configuring the core settings under Partners → Settings, the last item in the rail. These define how your partner program works.
How Partners Move Through the Console
Once your program is set up, a partner relationship generally moves through the console in this order:
- Find or invite a partner in Partner Discovery, or let one apply through a sign-up form. Applications wait under Applications for you to approve or decline.
- Track the invitation while it’s pending. An invited company is listed in All Partners from the moment you send, with the status
PENDING. See Collaborations. - Once they accept, the partner turns
ACTIVE. Assign them a Journey to guide them through onboarding. - As they become active, co-sell opportunities with them surface in Partner Co-Sells.
- Throughout the relationship, use Tasks to keep action items on track, Partner Files to share documents, and Training to certify them on your product.
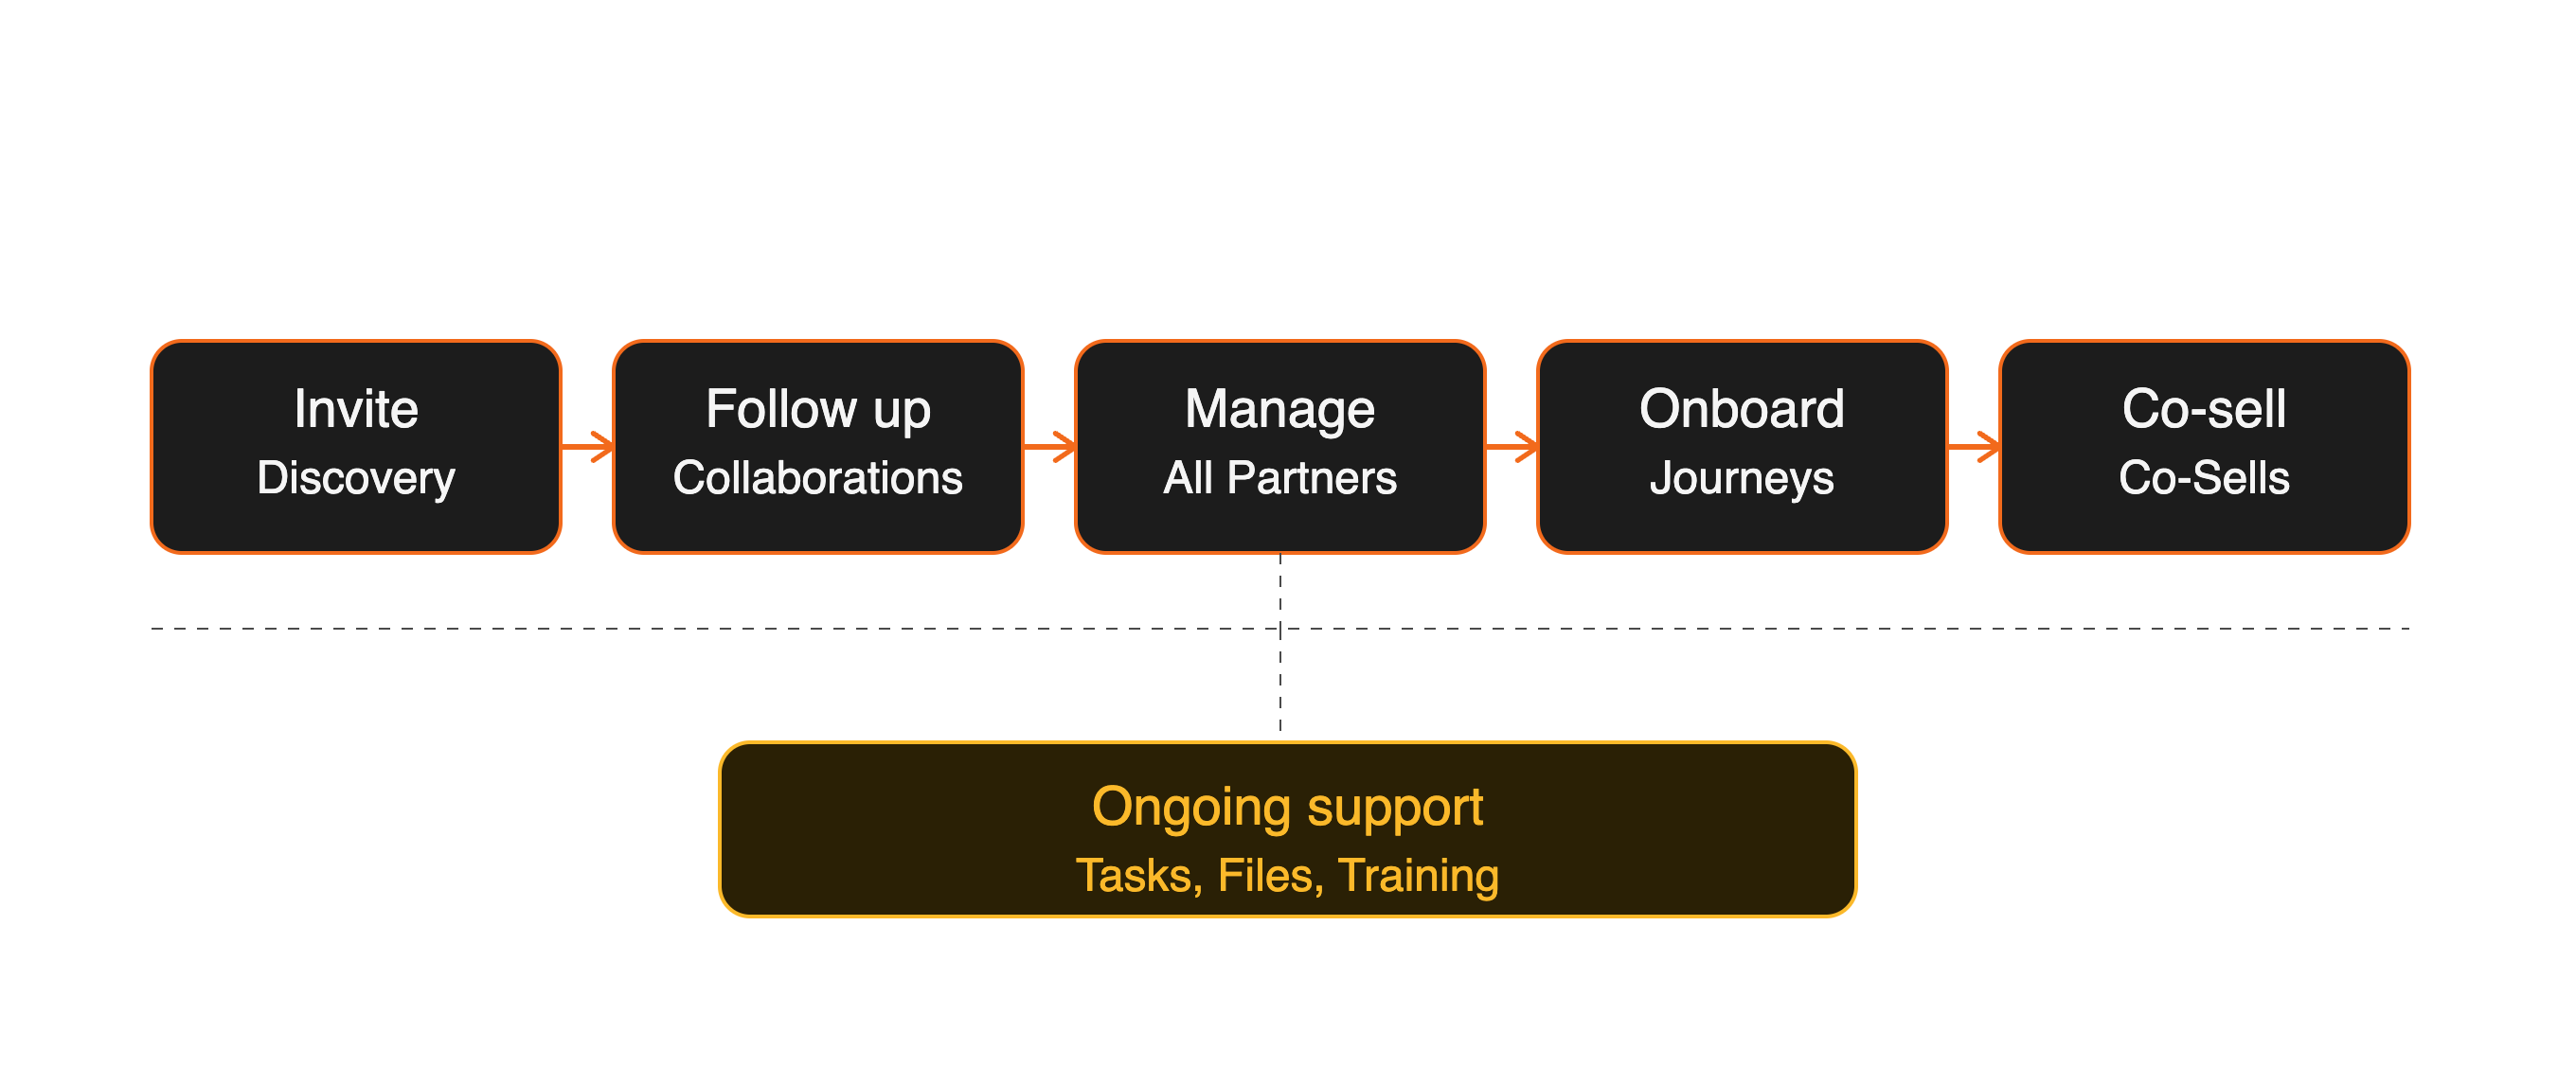
The sections below walk through each stop along that path.
Partner Discovery
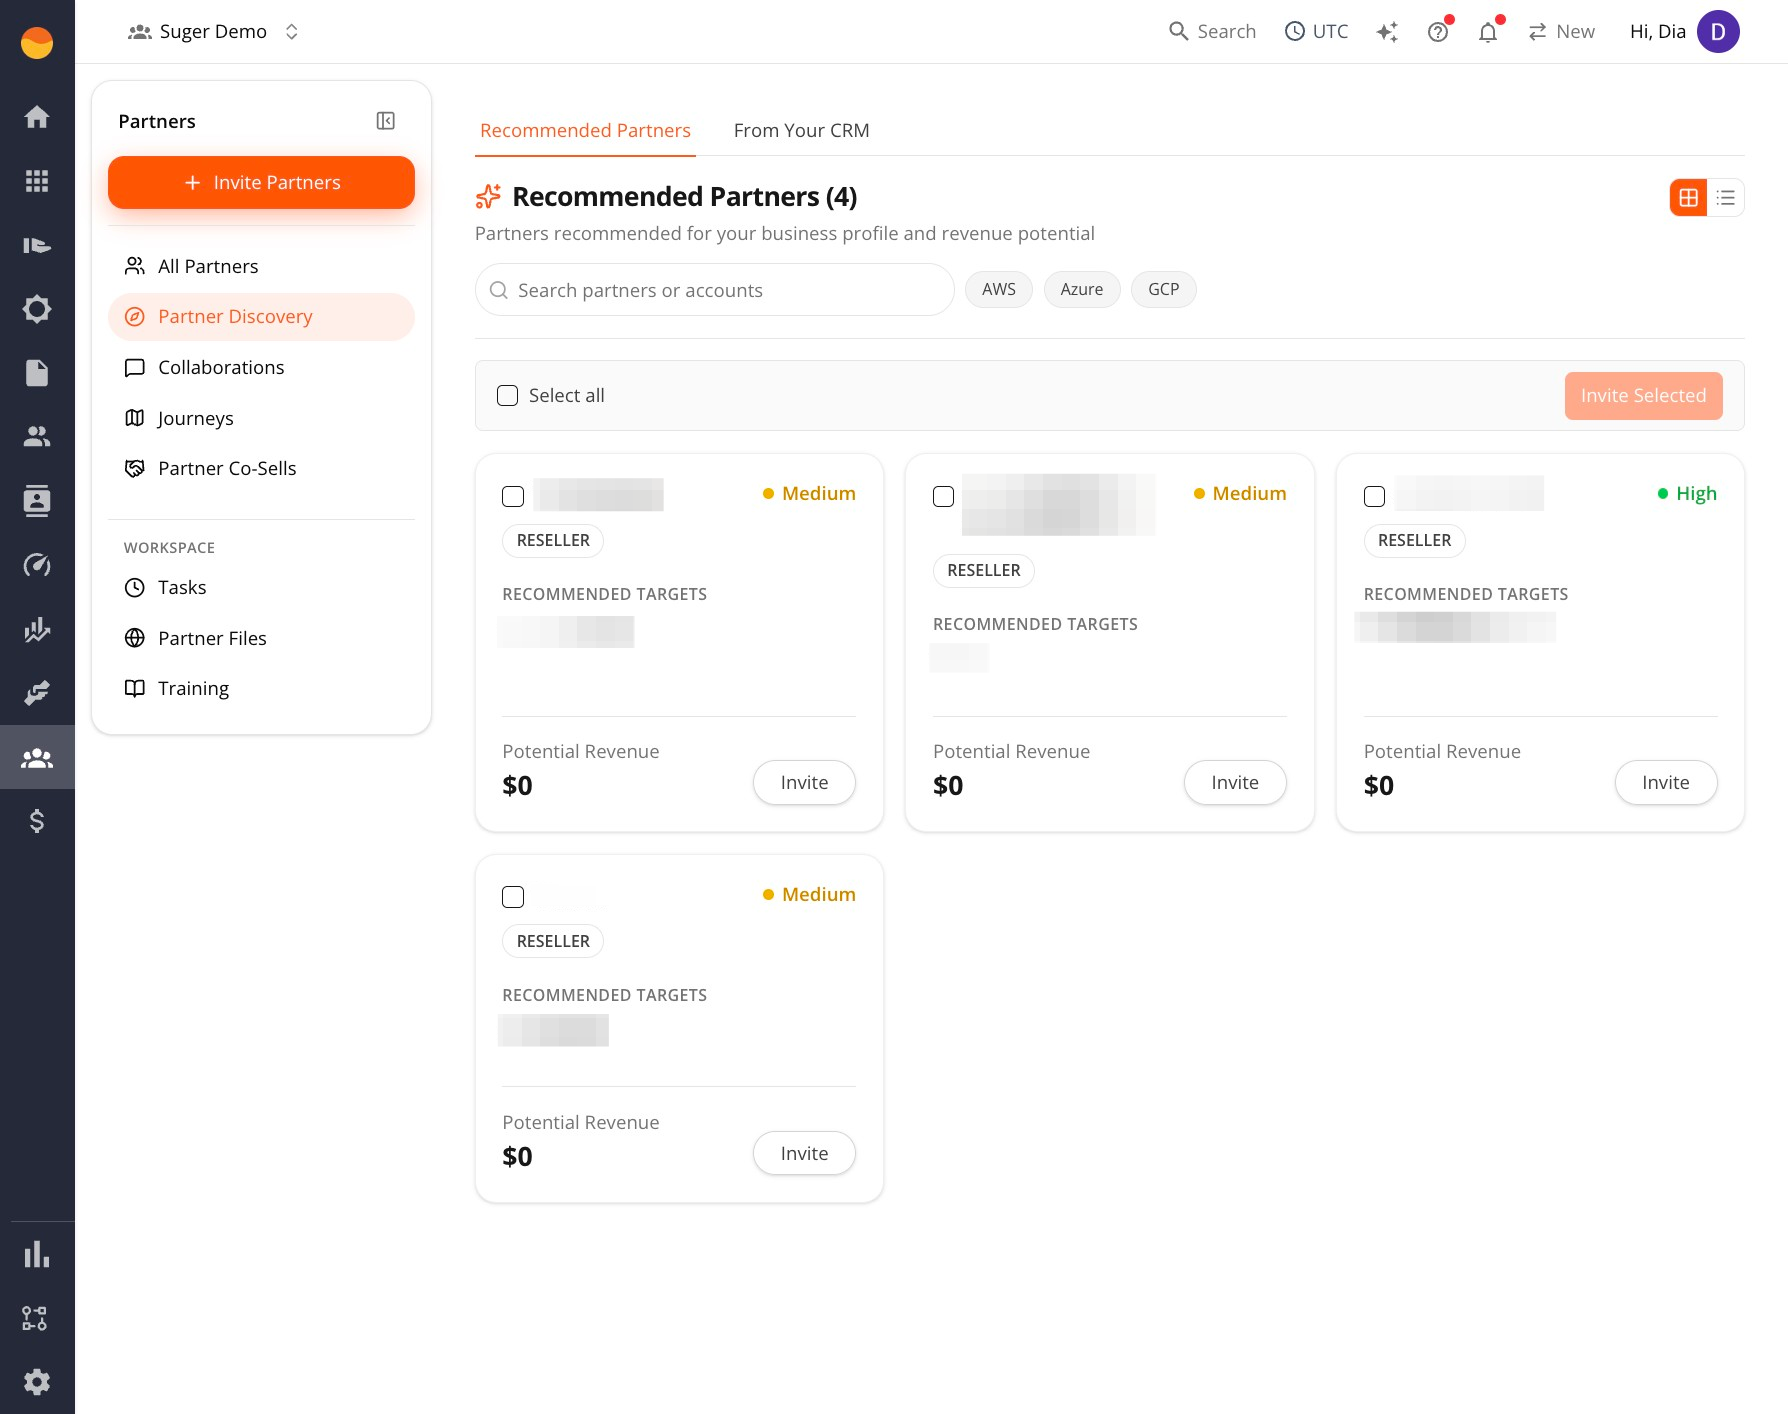
Partner Discovery is split into three sub-tabs, one per source:
| Sub-tab | Where the candidates come from |
|---|---|
| Recommended Partners | Companies Fours surfaced from the partner, referral, CRM, and co-sell data in your account, ranked by likely revenue impact. |
| From Your Marketplace | Resellers you have already transacted with on a cloud marketplace, with the revenue and deal counts to prove it. |
| From Your CRM | Salesforce accounts that match your saved discovery filter, once your CRM connection is set up. |
From here, you can review the candidates and click Invite on the ones worth pursuing, or select several and click Invite Selected.
Collaborations
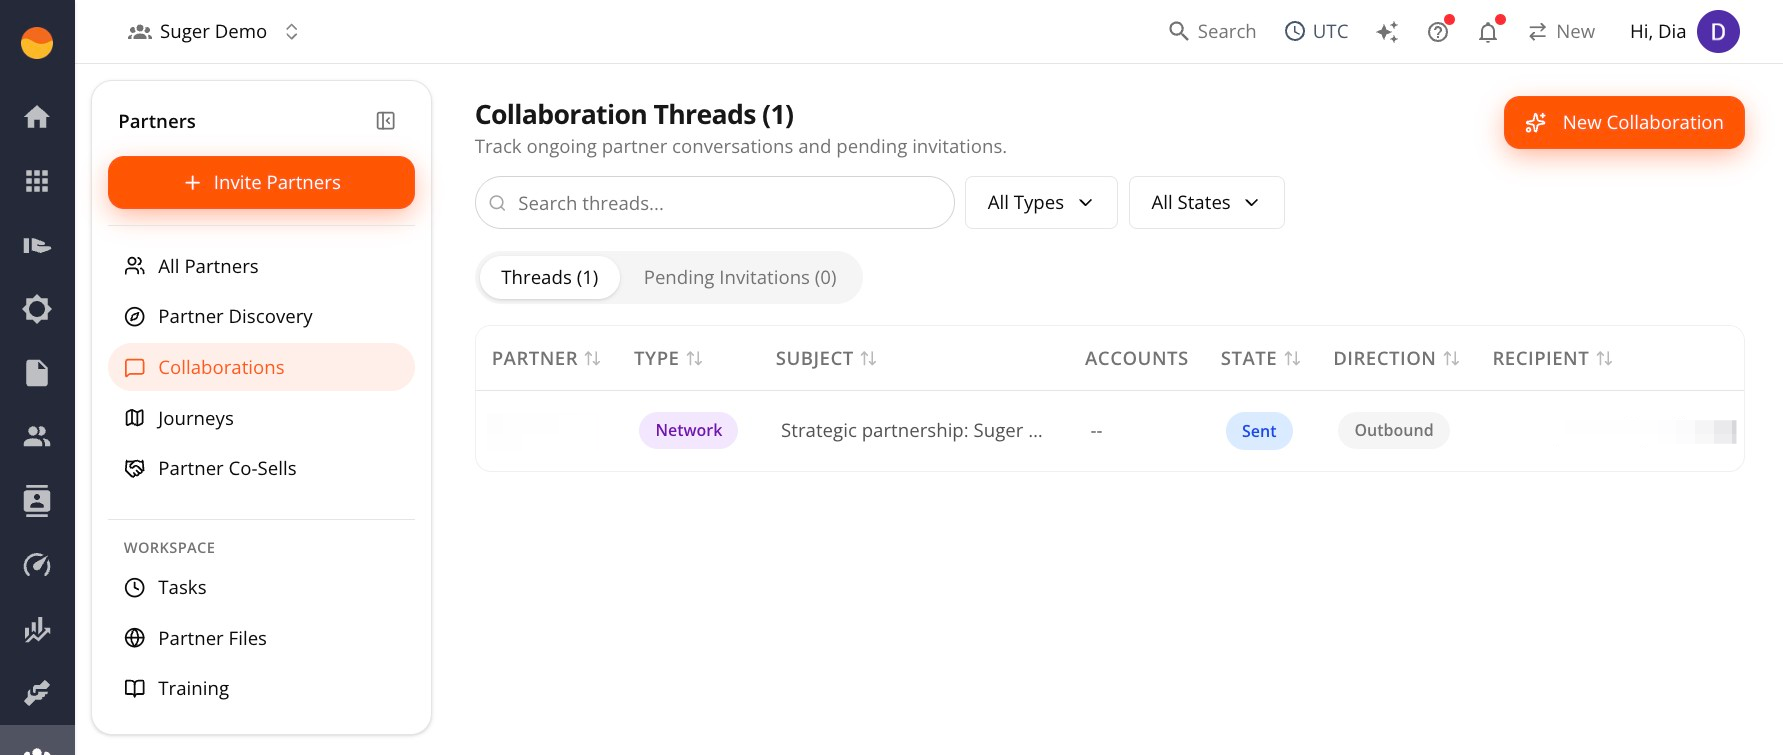
Collaborations are the conversations you’re having with partners, whether you started them (Outbound) or they came to you (Inbound). There’s no separate page for them:
- Invitations you send are rows in All Partners, listed as
PENDINGuntil the partner answers. While an invitation is waiting, the row’s ⋯ menu carries Resend invitation and Cancel invitation. - Requests that come to you, from your sign-up form or from another Fours organization, wait under Applications.
Check your PENDING partners regularly, and resend to the ones that have gone quiet. See Track Partner Collaborations.
Applications
Applications lists every request to partner with you. That includes submissions from your public registration form and invitations other Fours organizations send you in the app. Filter the list by status (Pending, Accepted, Declined, or Expired), and approve or decline the rows that are still pending.
This list keeps the applications you’ve already decided, including the ones you turned down. See Track Partner Collaborations.
If you’re an Admin, Applications has two sub-tabs: Partnership, the applications described above, and User access, the people asking to join your own organization. See Review requests to join your organization.
All Partners
Partners you invite appear in All Partners as soon as the invitation goes out, with the status PENDING, and turn ACTIVE once they accept. This is your main directory for managing partner relationships. The search box, Search by partner name, contact name or partner manager, matches a partner’s name, its champion’s name, or the name or email of its partner manager. To narrow the list, use the Engagement Type, Partner Manager, and Tier filters. Engagement Type offers the nine engagement types you set on partner records, and the table’s Engagement Type column shows each partner’s. The Partner Manager filter lists your teammates from A to Z: type in Search managers… to find one by name or email, and the managers you’ve already picked stay at the top of the list.
From here, you can open partner profiles, review their details, update information, and access their related activity. To invite a partner, click + Invite Partners at the top right of the page header; see Invite Partners.
To take the list elsewhere, click Export CSV at the top right of the page, beside + Invite Partners. It downloads partners_YYYY-MM-DD.csv, dated in the time zone set in the console’s Timezone selector, with every partner that matches your current search, filters, and sort — across all pages, not only the one on screen — up to 50,000 partners. The file has the columns the table is showing, in the same order, plus Contact Name, Contact Email, Contact Title, CRM Account Name, CRM Account ID, and CRM Provider. If nothing matches, Fours says so instead of downloading an empty file.
Until an invited partner answers, its row’s ⋯ menu also carries Resend invitation and Cancel invitation; once the invitation has expired, it carries Resend invitation only. If the partner record has no contact of its own yet, the row shows the person you invited, and Email not sent appears under the contact email when the invitation email couldn’t be sent. See Invite Partners.
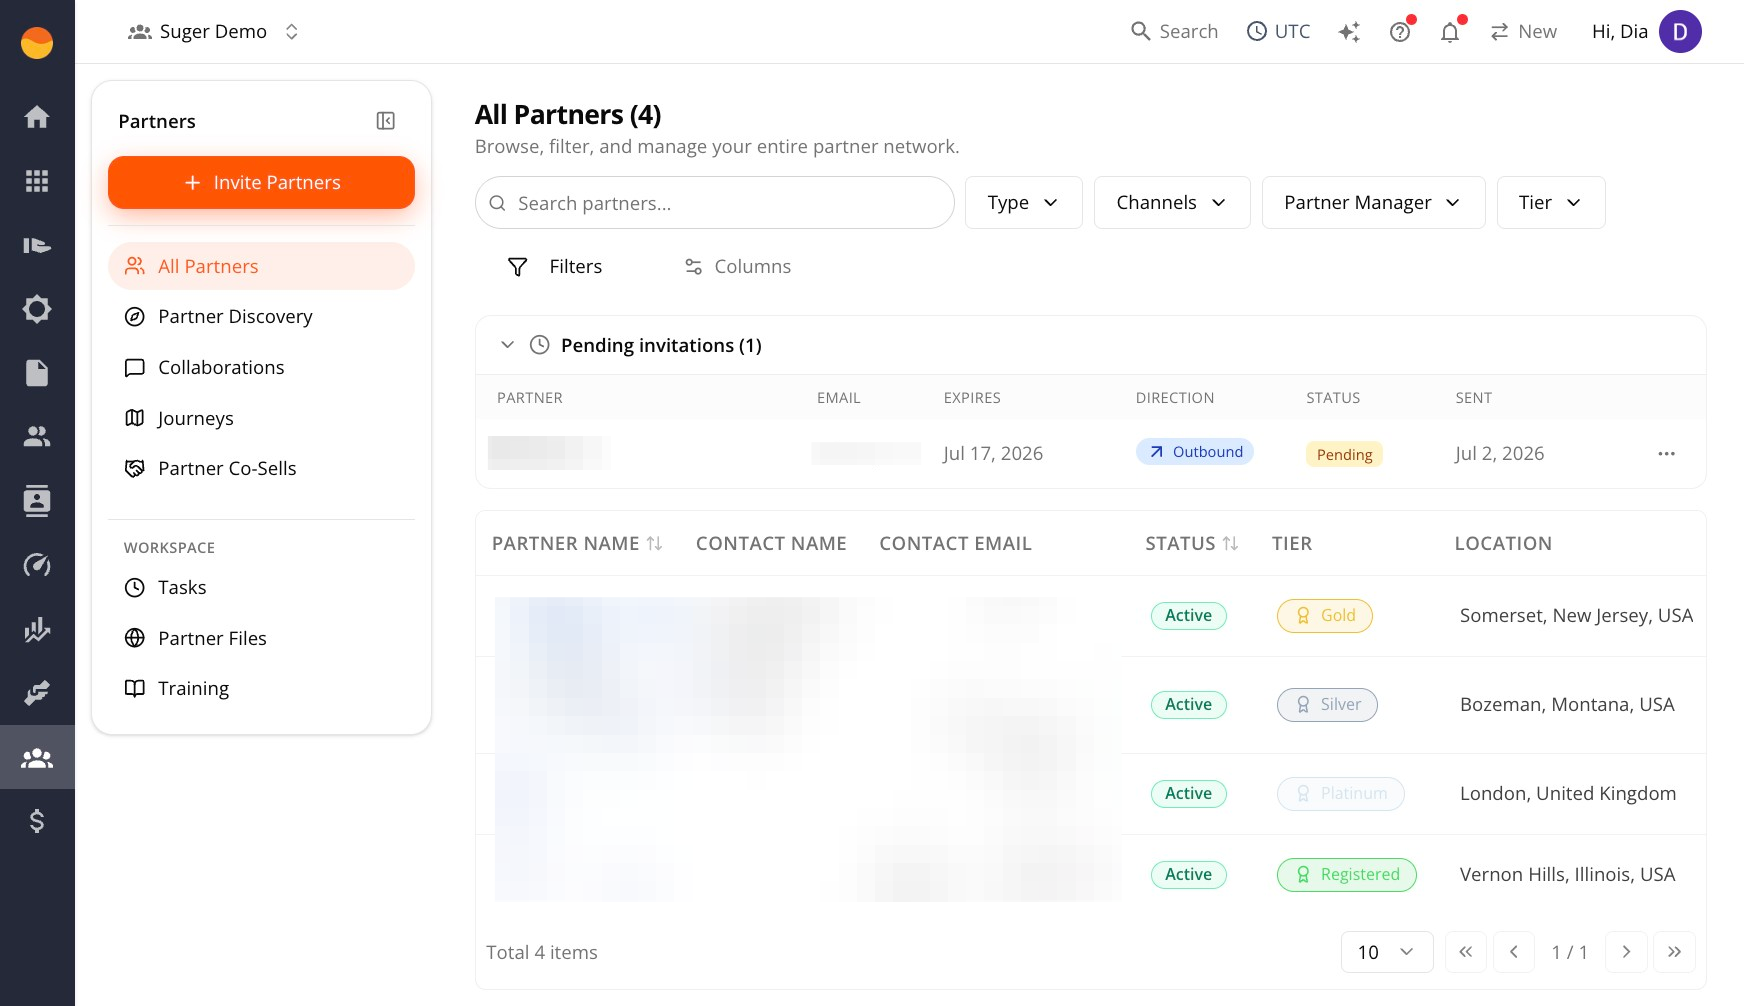
Opening a partner gives you their record, itself split into sections down the left: Overview, Co-Sell, Contacts, Commissions, Marketplace, Journeys, Tasks, Resources, Events, Training, and Agreements. For what each section holds and how to work one, see Work a Partner Record.
Journeys
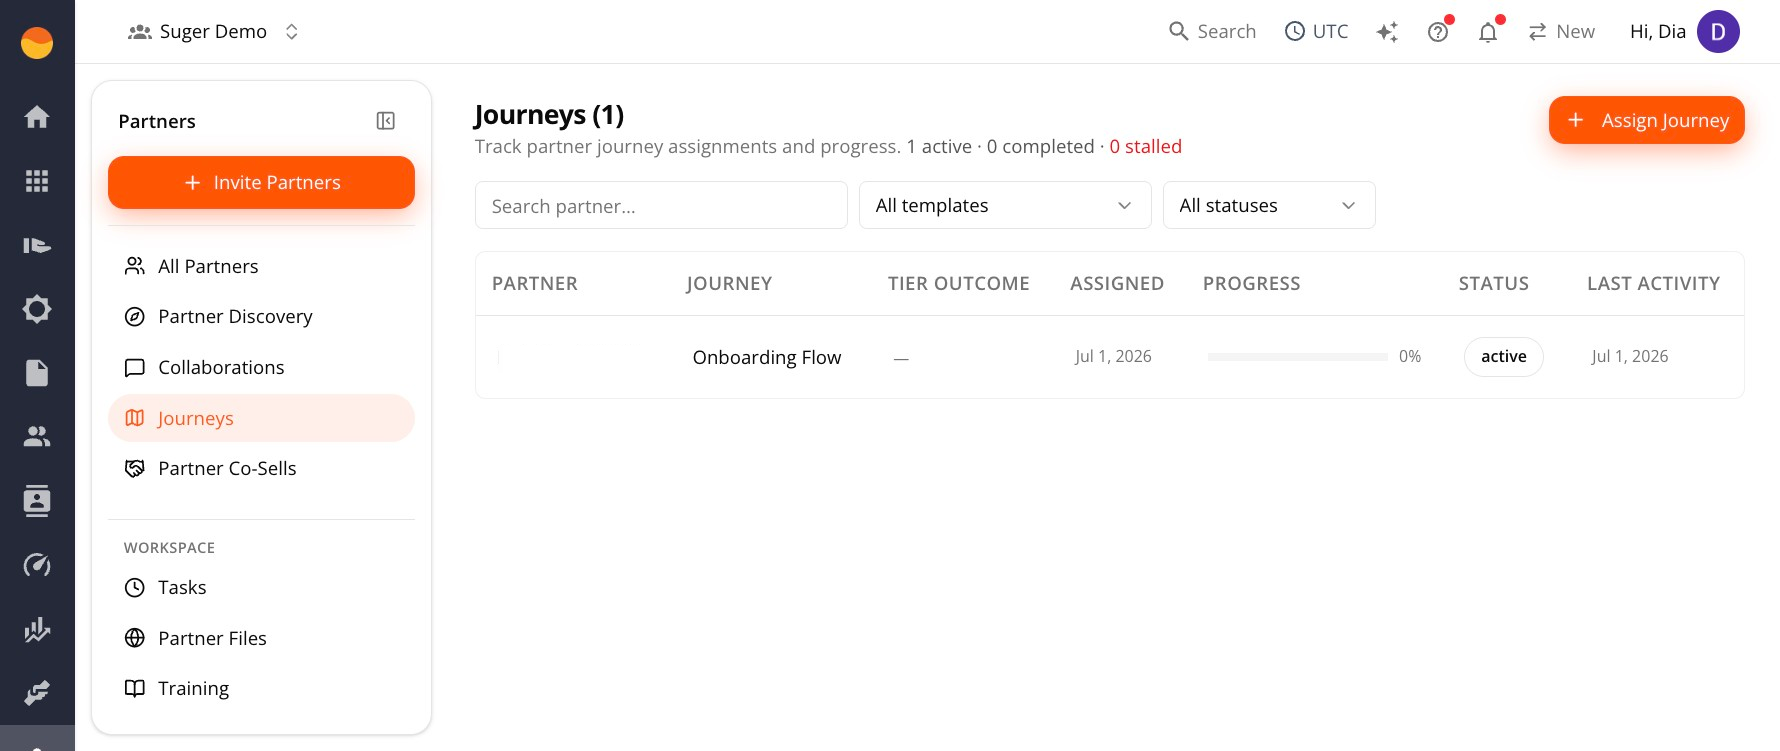
Journeys are onboarding plans built from reusable templates. Each assigned Journey tracks a partner’s progress through onboarding so you can quickly see who’s active, completed, or stalled.
From here, you can assign onboarding plans to new partners and monitor their progress over time.
Partner Co-Sells
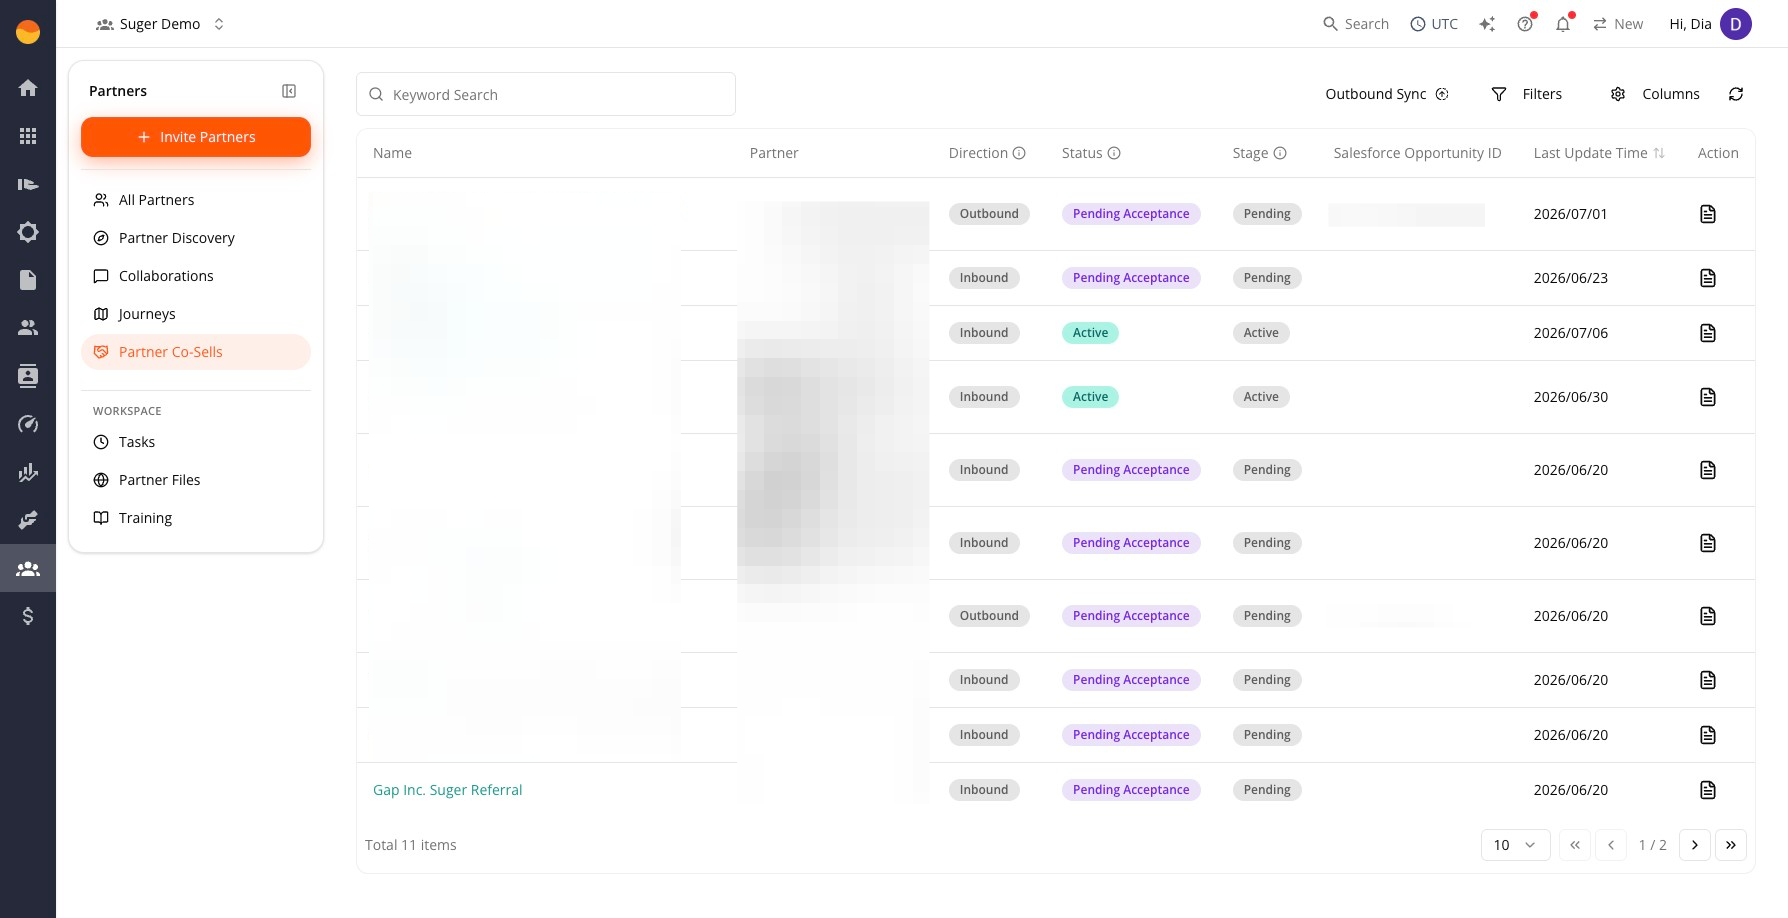
Partner Co-Sells brings together shared sales opportunities between you and your partners. Each opportunity shows its direction, current status, and linked Salesforce Opportunity ID when Salesforce is connected.
From here, you can accept new co-sell opportunities, monitor active deals, and collaborate with partners throughout the sales cycle.
Tasks
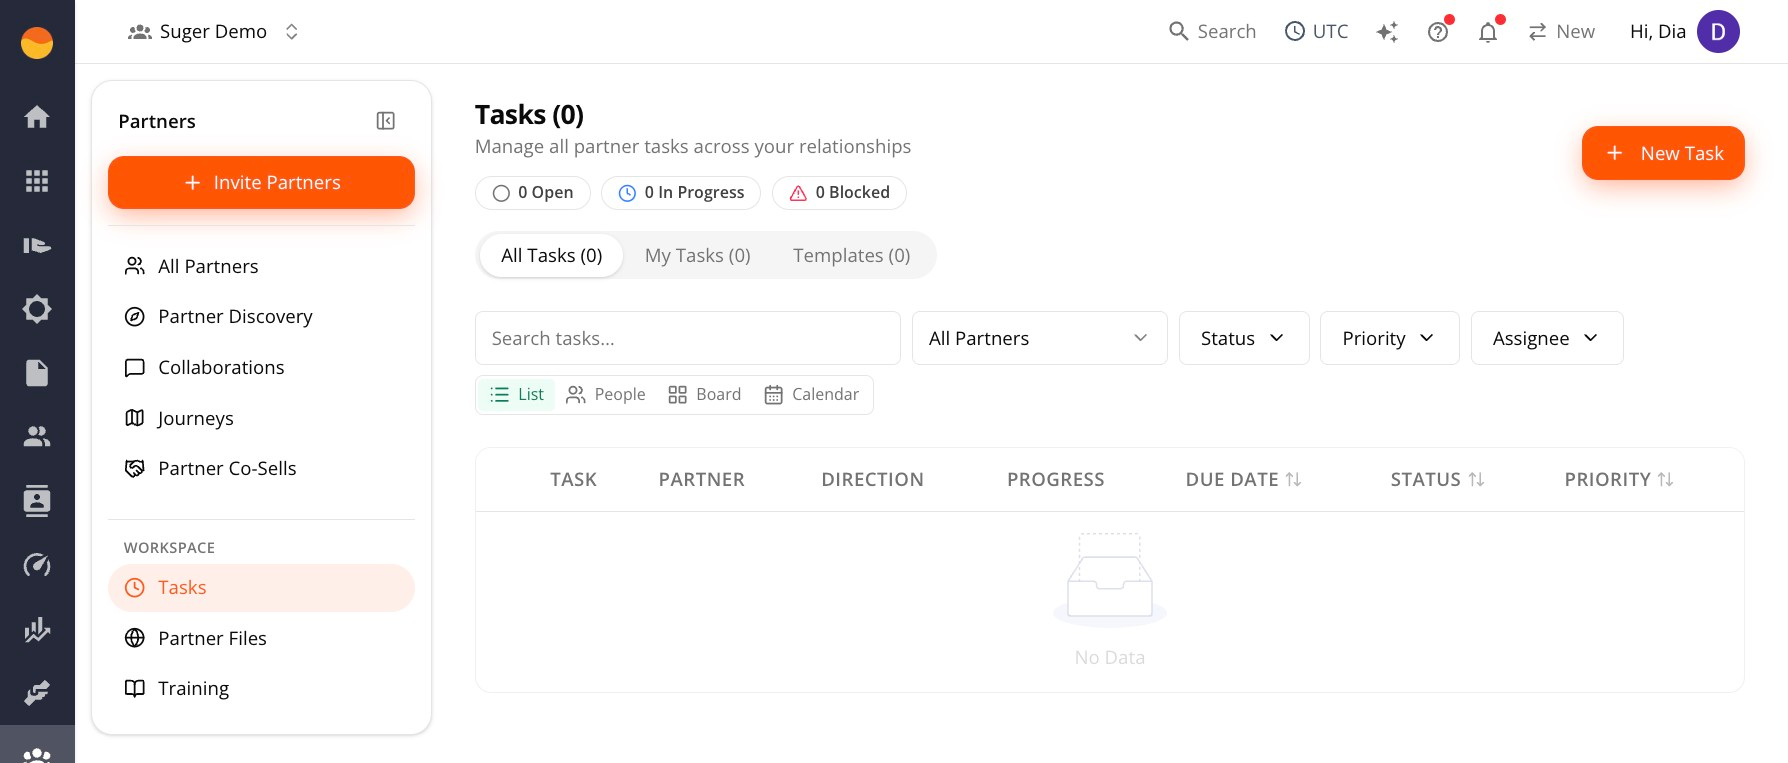
Tasks help you track follow-ups, document requests, approvals, and other action items for individual partner relationships.
Each task has a Direction that shows who needs to act next. Outbound means your team has work to do, while Inbound means you’re waiting on the partner. If you regularly create the same set of tasks, use a Template to create them all at once instead of adding them individually.
Partner Files
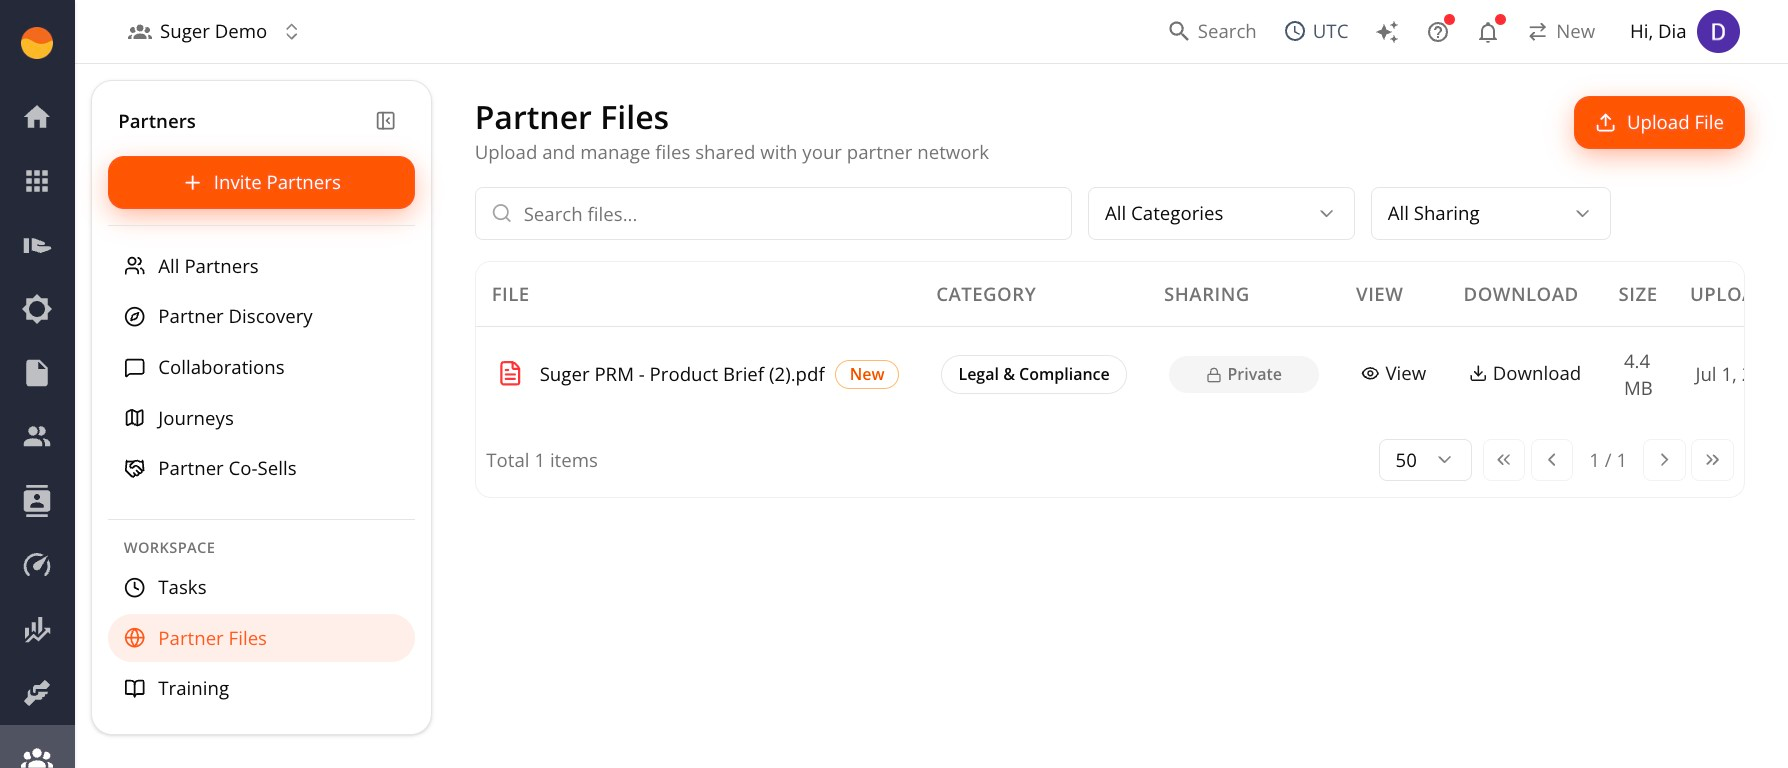
Partner Files is a shared library for resources you want partners to access, such as sales collateral, onboarding guides, product documentation, marketing assets, and legal documents.
Files are organized into categories, and each category can have default sharing permissions configured in Partners → Settings → File Sharing Defaults.
From here, you can upload resources, choose who can access them, and organize them into categories so partners can easily find what they need.
Training
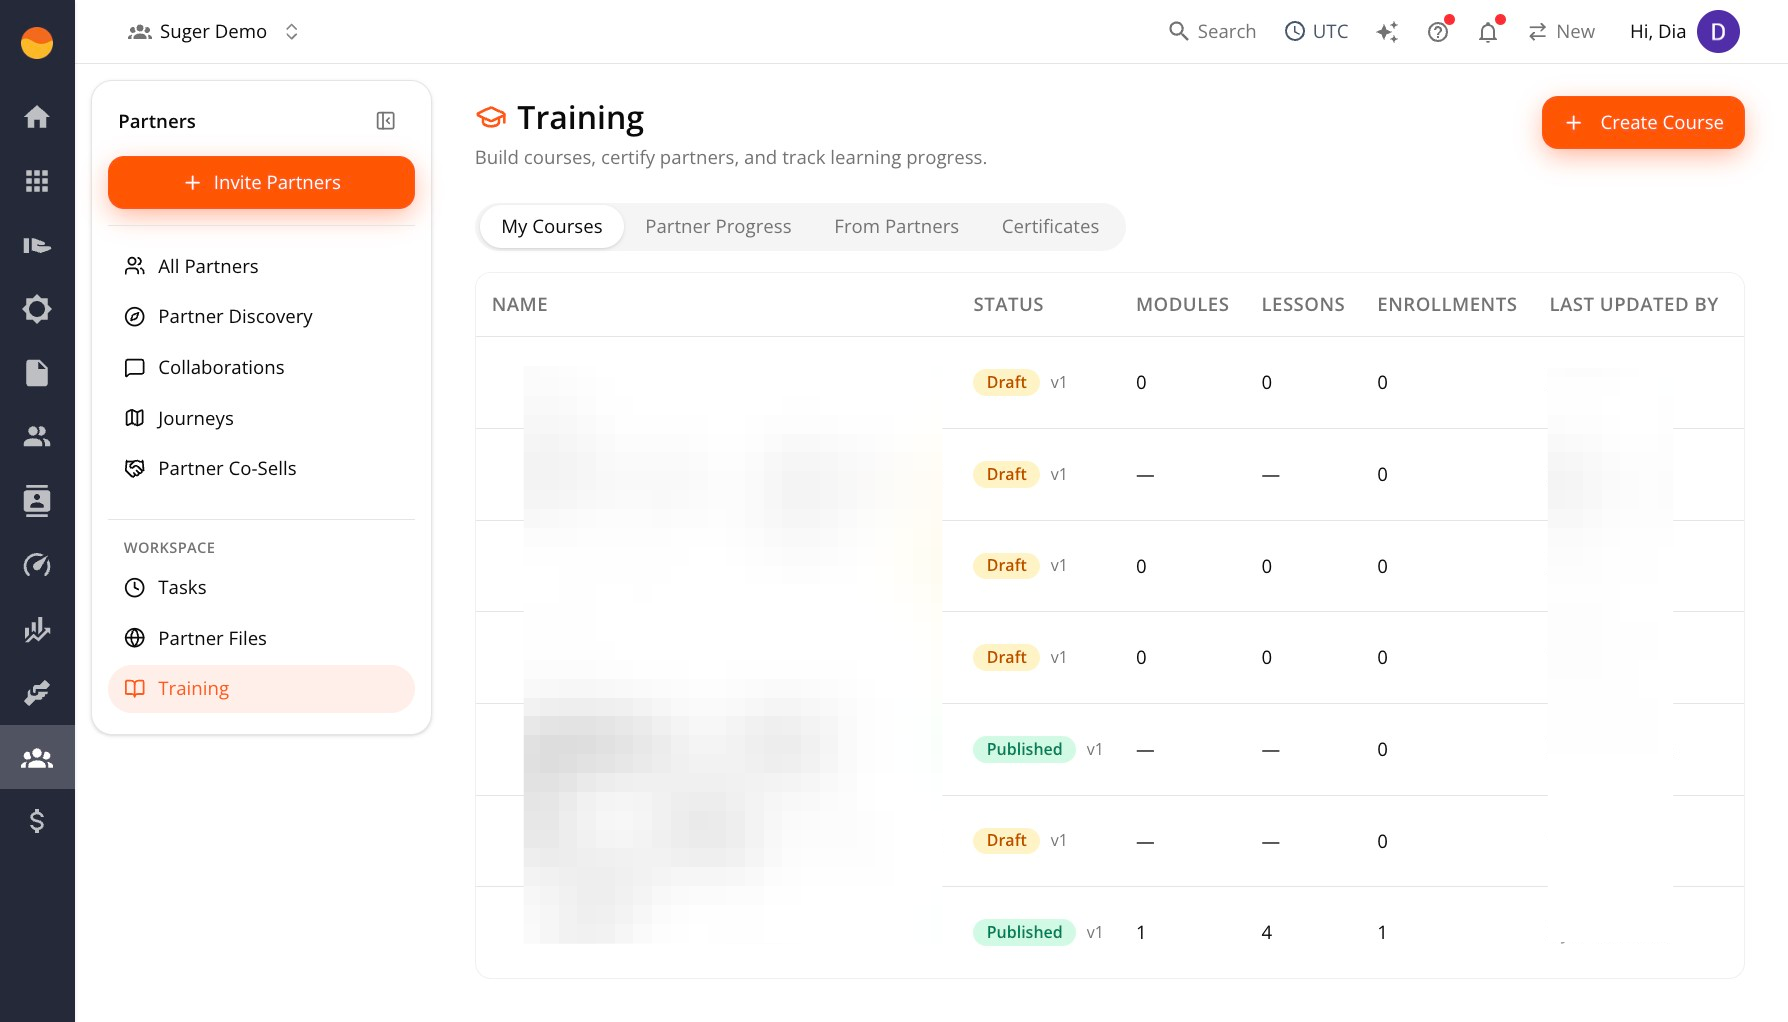
Training lets you create learning content for your partners and track their progress. Partners can also share their own training with your team, making it a central place to manage enablement in both directions.
Alongside courses, the Training area includes Certificates for recognizing course completion and Partner Progress for monitoring how partners and individual learners are progressing.
From here, you can create onboarding or certification courses, review completion progress, and manage certificates for partners who complete your training. Check From Partners when partners have shared training with your team.
Events
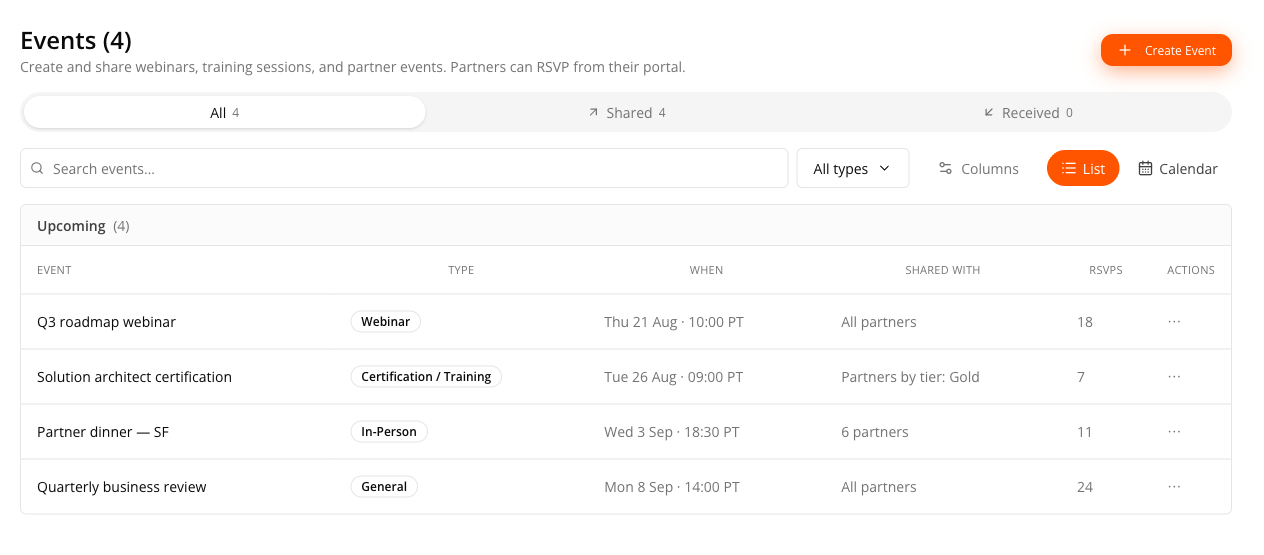
Events is a single feed of webinars, training sessions, and partner events. Create an event, share it with partners, and they RSVP from their own portal.
The All, Shared, and Received tabs slice the feed by who owns each event. Events you own show an RSVP count and let you work the attendee roster; events shared to you offer Attending and Decline instead. The same set can be read as a list or on a calendar.
Partner organizations can RSVP but cannot create events.
See Create and Share Partner Events.
Broadcasts
Broadcasts sends one message to every partner’s Slack channel at once, then collects the replies and reactions in one place so you can see who engaged.
Use it for the announcements you’d otherwise paste into a dozen channels by hand — a release, a program change, a deadline. See Send a Broadcast to Your Partners.
Broadcasts post into Slack, so they depend on your workspace being connected and a channel being mapped to each partner first — see Connect Slack for Your Partners.
Dashboard
Dashboard, at the top of the rail, reads the whole program back to you in four tabs: Today for what needs you now, Performance for pipeline, co-sell, commissions and enablement, Team for each partner manager’s book, and Footprint for where your partners are. Filters for marketplace, partner type, tier, and My partners narrow every tab at once, and each row that needs action links to the place you act on it.
See Partner Program Dashboard.
Working With PRM Tables
The lists across PRM behave the same way, so what you learn on one table carries to the next.
- An Actions column. Every row’s actions live behind the kebab (⋯) menu in the trailing Actions column, rather than being spread across the row. Destructive choices such as Delete are marked in red.
- A Columns chooser. The Columns button opens a checklist of every available column. Your choice is remembered per table and per browser, so a table you trimmed stays trimmed the next time you open it.
- Definitions on the numbers. A count or metric with an ⓘ beside it — a tile, a progress bar, a total — shows what it counts when you hover over the ⓘ or tab to it. Where the count sits inside a tab or an expandable header, such as All Tasks and My Tasks, or the N pending deal registrations bar, hover over or tab to the tab or header itself. Some counts are narrower than they look: on the Tasks page, the Open, In Progress, and Blocked counts cover only the tasks on the current page, after your filters.
- Filters above the table. Each list carries the filters that make sense for it — status, owner, tier, direction, and so on. Filters apply to the list you’re looking at and reset when you navigate away, so set them for the task at hand rather than expecting them to stick.
The All Partners list adds a Filters popover for more precise, multi-field searches. Unlike the quick filters, a saved advanced filter is remembered and re-applied the next time you open the list.
Spotted something wrong or out of date on this page? Tell us and we'll correct it.