Email Notification
Enable and set up the email recipients to receive notification events from Suger service
Overview
Email notifications let you configure per-scope routing rules so that each notification event type has its own enable/disable toggle, recipient lists (TO, CC, BCC), and optional custom template. When an event from Suger matches an enabled scope, an email is automatically sent to the designated recipients.
Configuration
Enable Email Notification
Go to the settings page and open the Notification tab. Toggle the Enable Email Notification switch to activate email routing.
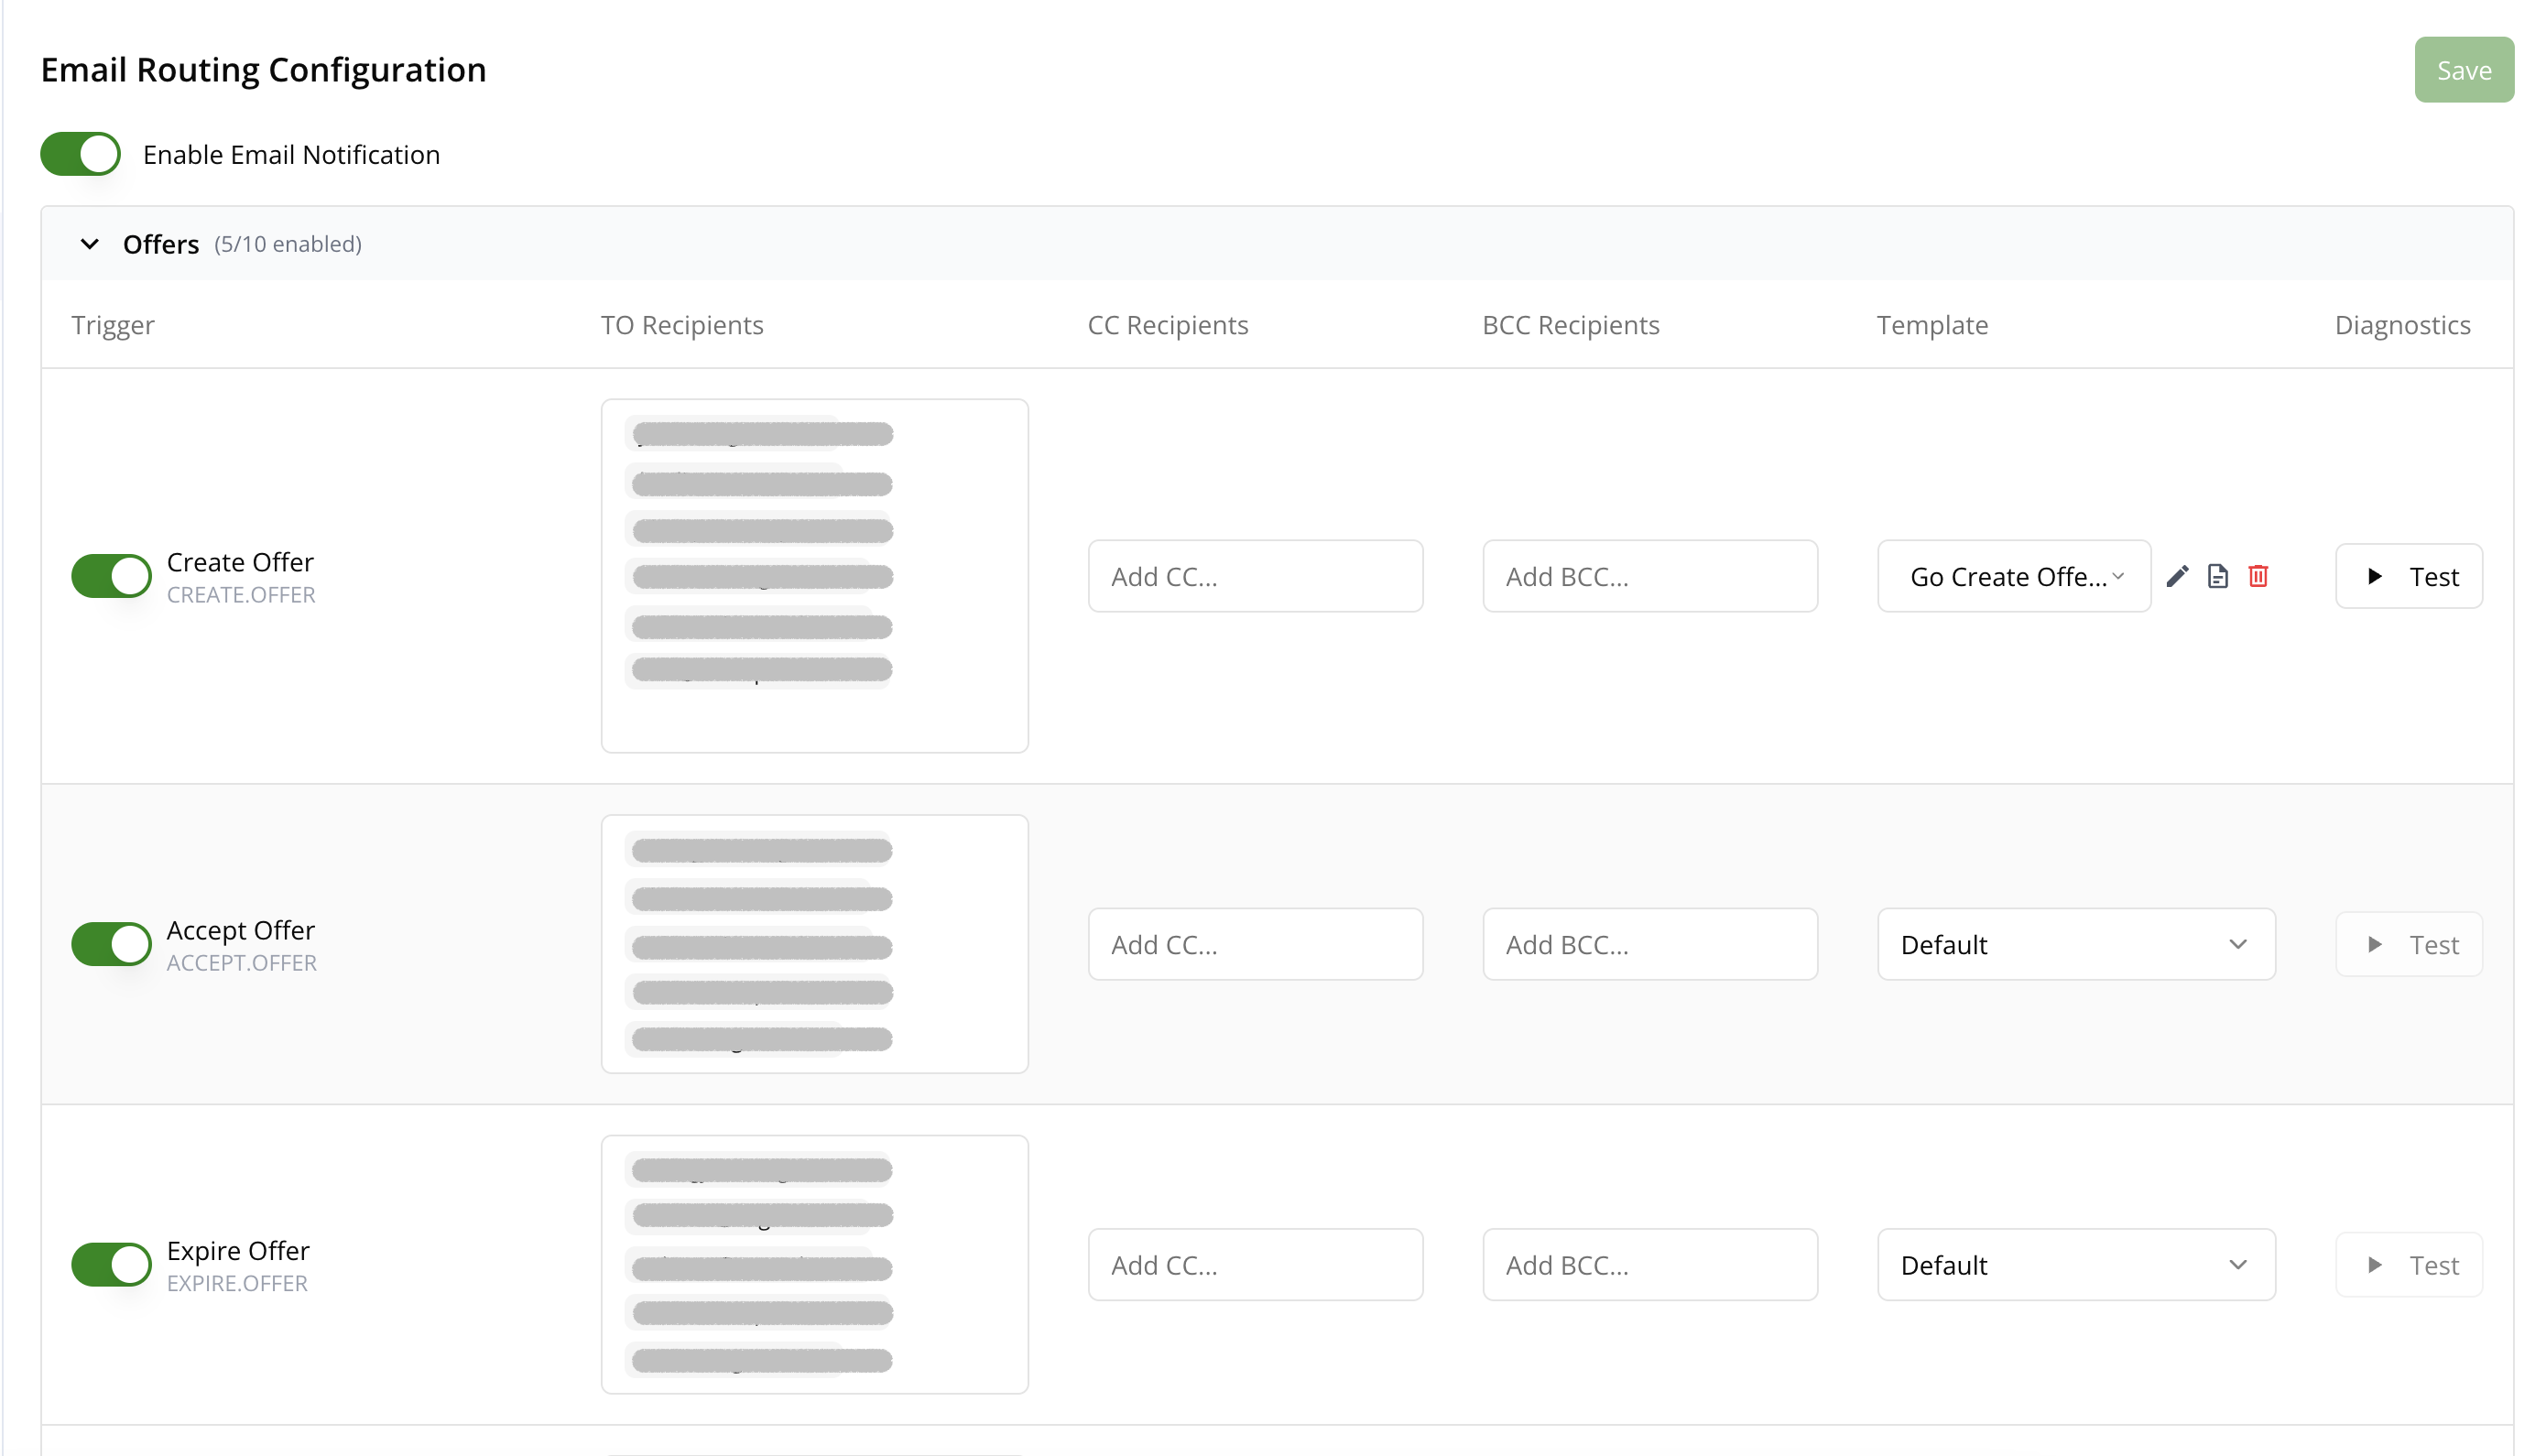
Email Routing Catalog
Once email notification is enabled, the Email Routing Configuration table displays all available notification scopes organized by category (Offers, Entitlements, Co-Sell, Workflows, etc.). Each category can be expanded or collapsed.
Every scope row provides the following columns:
| Column | Description |
|---|---|
| Trigger | Toggle to enable or disable the notification scope. The scope name and its raw identifier are displayed. |
| TO Recipients | Email addresses that receive the notification. Type an address and press Enter or comma to add. |
| CC Recipients | Email addresses to CC on the notification. |
| BCC Recipients | Email addresses to BCC on the notification. |
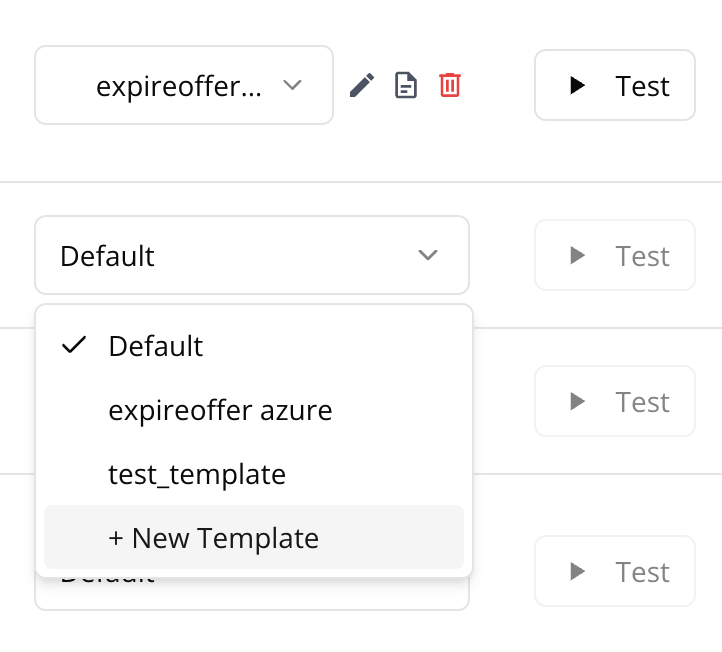
| Template | Select a custom email template from the dropdown, or choose + New Template to create one inline. When a template is assigned, icons appear to edit, view details, or delete it. |
| Diagnostics | Click Test to send a test email using the assigned template (requires a template to be selected). |
Click Save after making changes to persist your configuration.
Additional Settings
Below the routing catalog, two additional toggles are available:
- Disable Email Notification on Offer Ready — Prevents sending email notifications when an offer is ready to accept.
- Enable Expire Soon Offer Workflow Notification — Enables workflow notifications for offers that are about to expire. When enabled, you can configure the number of days before expiration to trigger the notification (default: 7 days).
Update History
The Update History table at the bottom of the Notification tab shows an audit log of configuration changes. You can search across all fields and click a row’s detail icon to inspect the full JSON payload of the change.
Custom Templates
Custom email templates allow you to personalize your notification emails with dynamic content and professional layouts. You can create templates that automatically incorporate data from your notification events, making your emails more informative and engaging.
Create New Template
In the routing catalog, find the Template column for any scope row and select + New Template from the dropdown. The template creation dialog opens, and once saved the new template is automatically assigned to that scope.
In the template creation dialog:
- Enter a descriptive name for your template
- Select the evaluator type (currently, only Golang Template is supported)
- Use the email builder to design your template
- Click Create to save your template
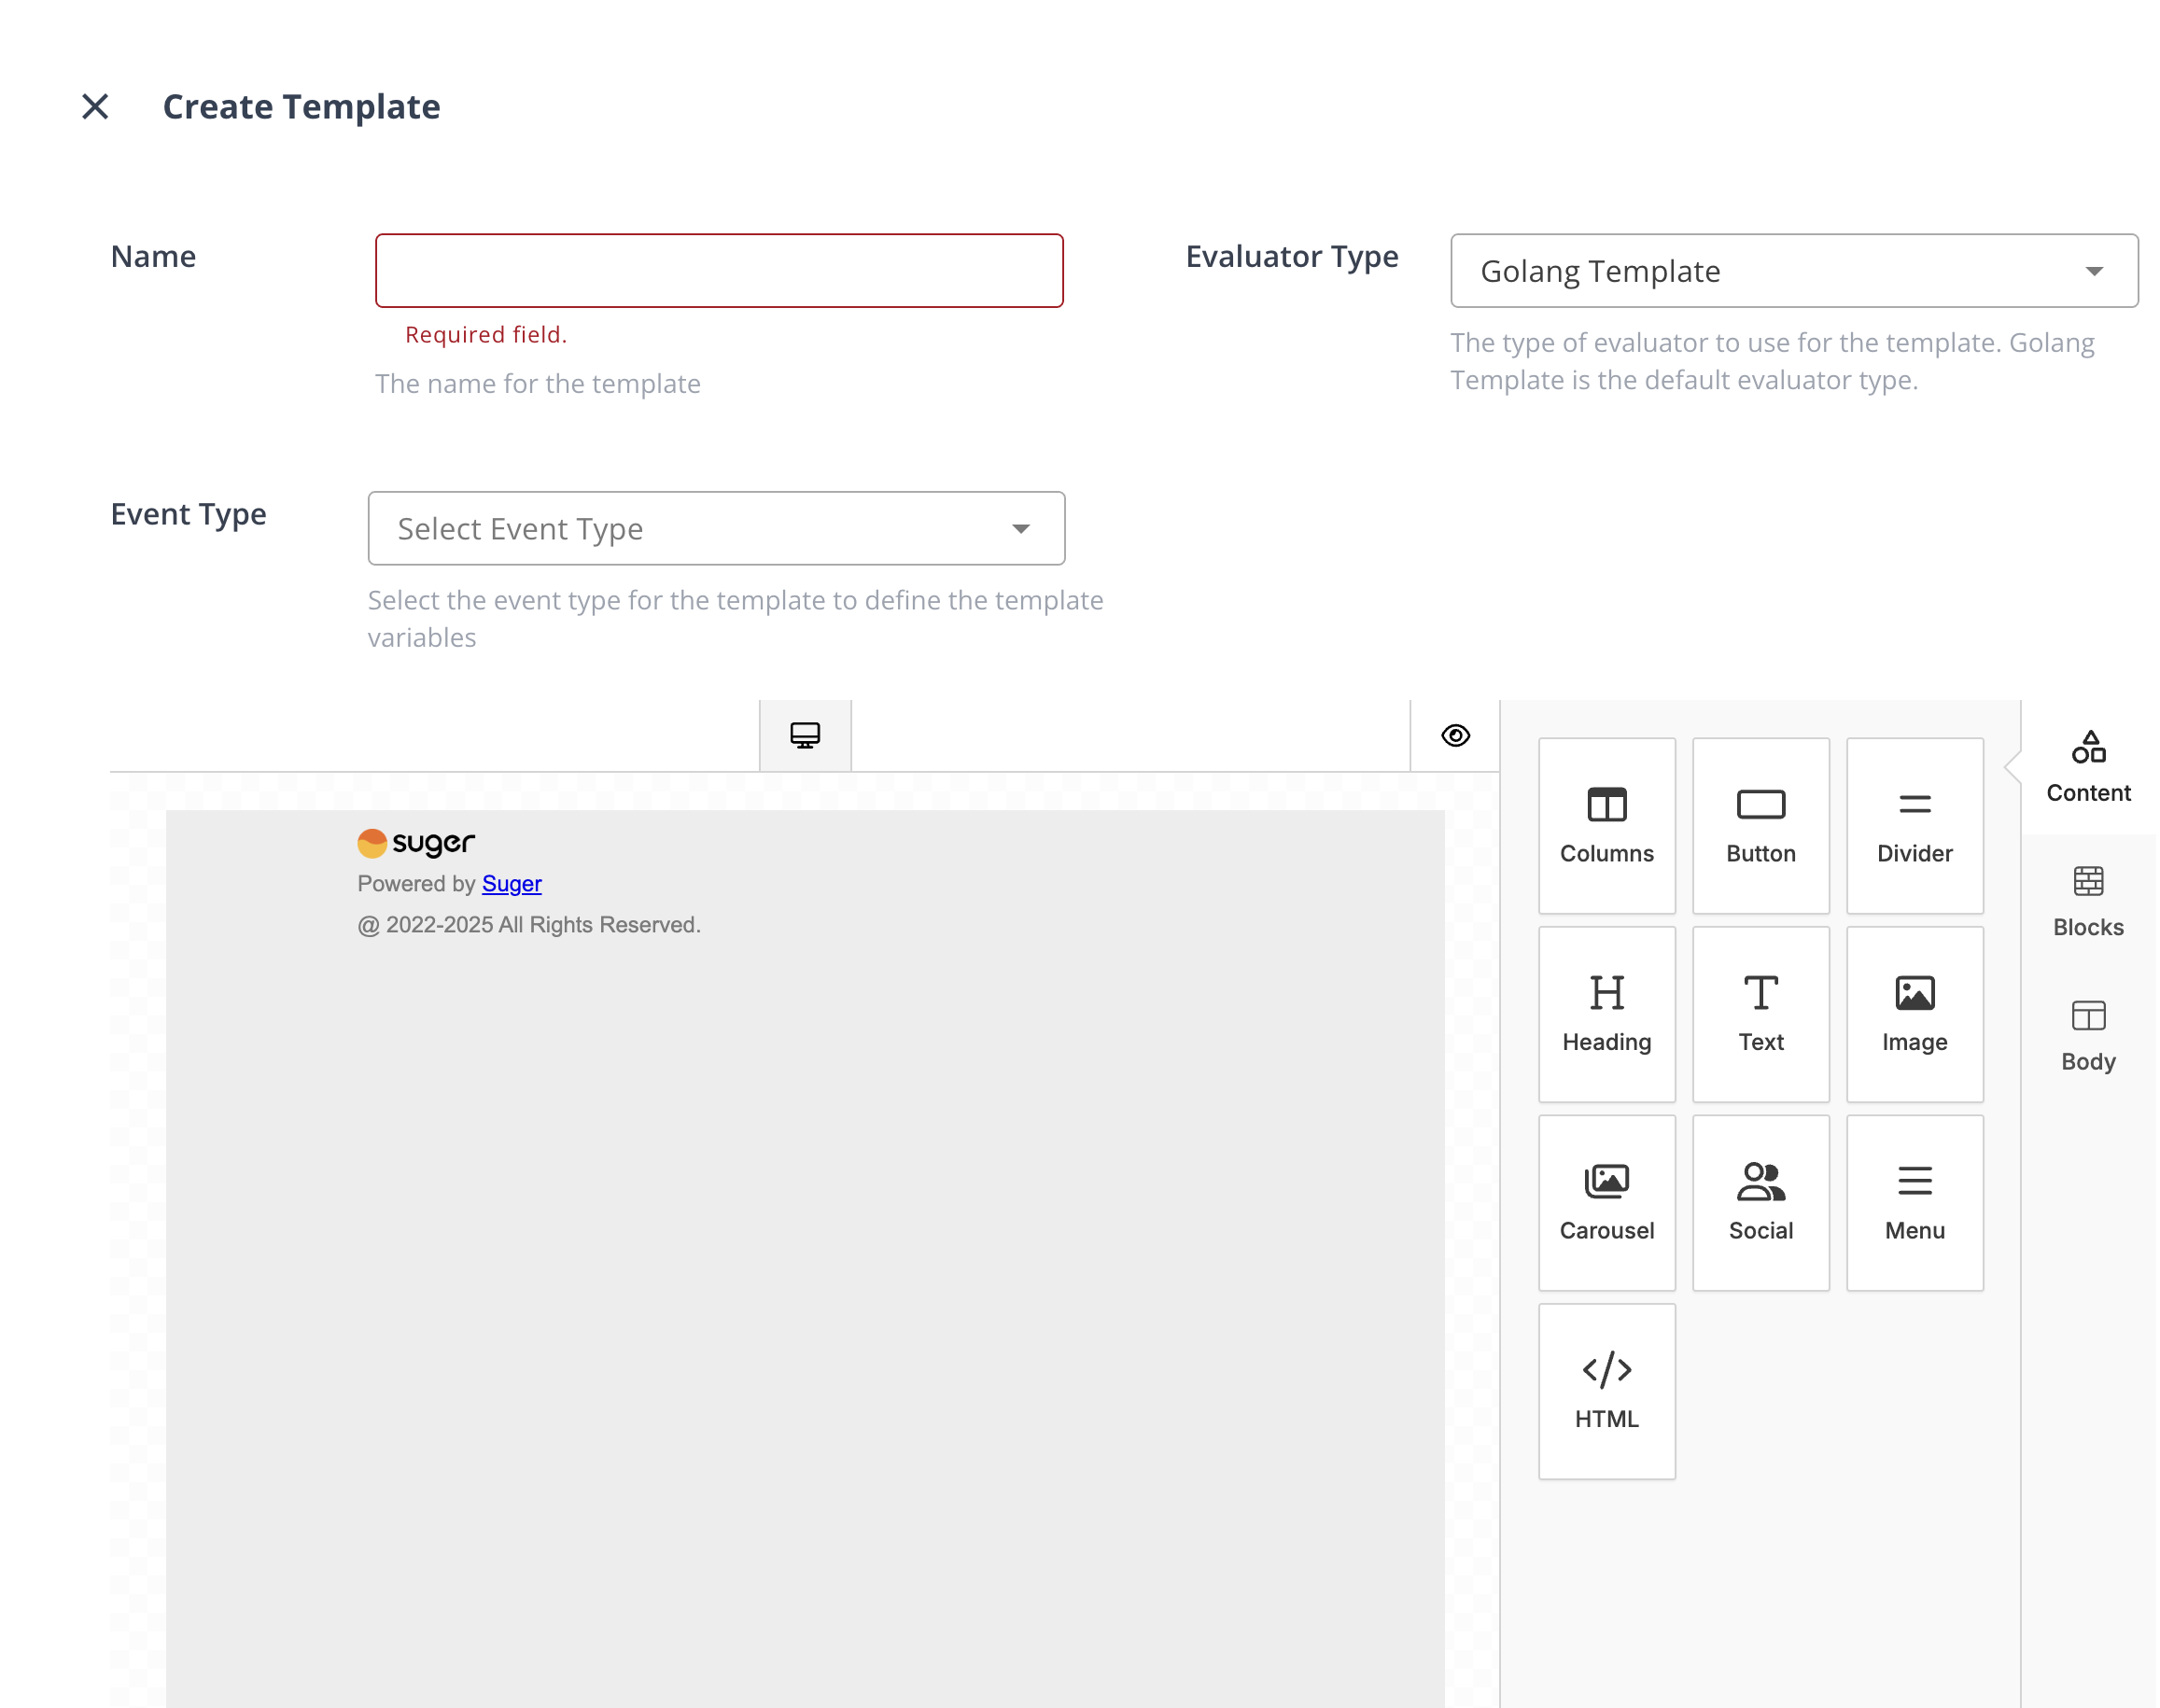
Use Email Builder
The email builder provides a comprehensive set of tools to create professional-looking emails:
- Columns: It allows your users to add columns to your design in order to have a better design arrangement.
- Button: Add any type of button in your email. You can change colors and styles.
- Divider: It gives your users appropriate spacing at any point they want in their design.
- Heading: Add headings (from level 1-6) to the design.
- Text: Text is a built-in tool so users can add text to their designs.
- Image: To make your emails attractive, you can add images using this tool.
- Social: It is a built-in tool that lets users add their social media icons to your design.
- Menu: Menu is a built-in tool used to create navigation menus.
- HTML: This tool will give your users room to add custom HTML to the design.
Working with Dynamic Data
Using Single Variables
-
Select a notification event type to make its variables available in the builder. By default, use the
BaseNotificationEvent. -
In the text or heading tool, click the
Merge Tagsbutton and select the variable you want to insert
Looping Over Lists
To display multiple items from a list:
- Add a Columns tool to your template
- Click the tag symbol on the Columns tool
- Select the list you want to iterate over
- For complex objects in the list:
- All variables from the list items become available within the Columns block
- Use them in text tools just like single variables
- For simple values (strings or numbers):
- Use the
thismerge tag to access the current item within the Columns block
- Use the
Assign Templates to Notification Scopes
Templates are assigned directly in the Email Routing Catalog:
- Go to the settings page and open the Notification tab
- Find the scope you want to customize in the routing catalog
- In the Template column, select an existing template from the dropdown or choose + New Template to create one
- When a template is assigned, use the inline icons to:
- Edit the template in the email builder
- View details as a JSON payload
- Delete the template (removes it from all scopes that reference it)
- Click Save to persist your changes
Test Custom Templates
Before using a template in production, you can test it to ensure it works as expected:
- In the routing catalog, find the scope row with the template you want to test
- Click the Test button in the Diagnostics column
- In the test dialog, provide the following information:
- To Email: The recipient email address for the test
- CC Emails: Optional comma-separated list of email addresses to CC
- One event json data: Choose (and modify as you want) between:
- Mock JSON data files
- Last recorded events for your organization
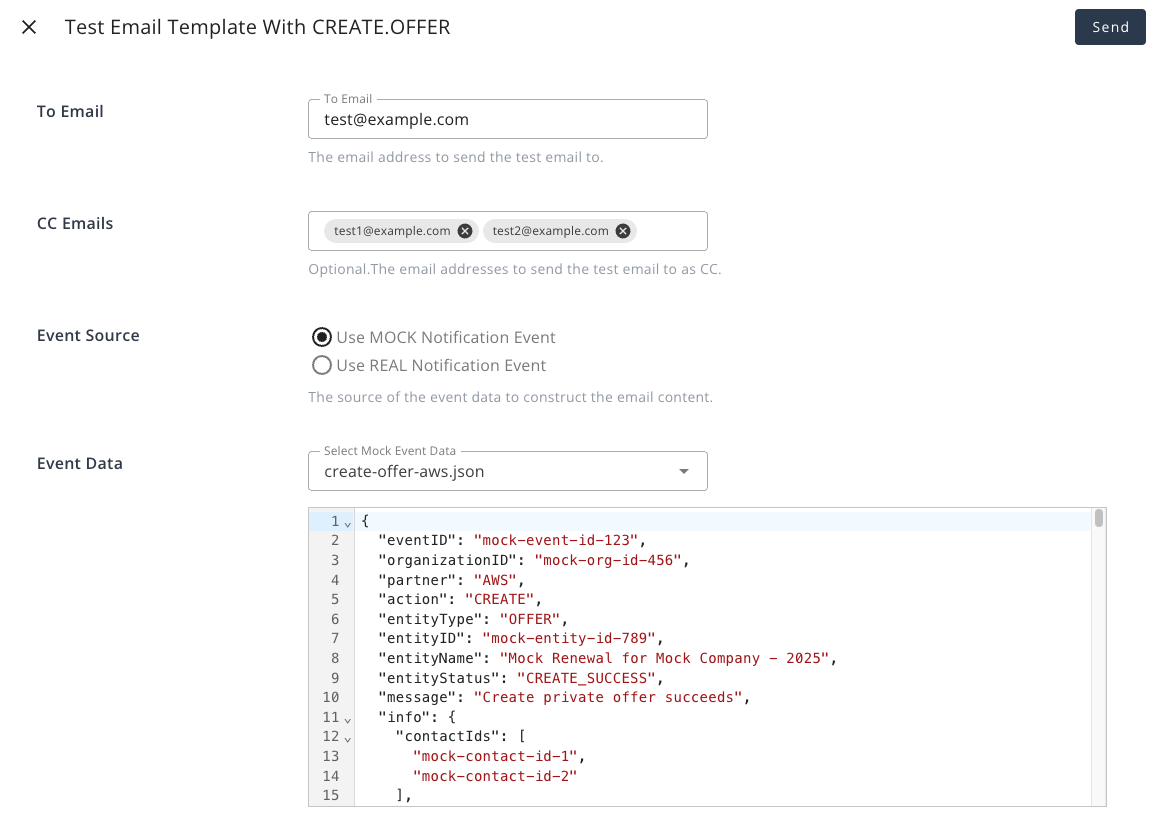
You can also edit the template directly from the test dialog by clicking the Edit Template button, which will open the email builder.