# Create CPPO
Create a reseller authorization (CPPO) directly from a HubSpot deal using the Suger App.
---
## Overview
A reseller authorization — also called a Channel Partner Private Offer (CPPO) — is how you give a reseller or channel partner permission to sell your product on a cloud marketplace on your behalf. In plain terms:
- You (the ISV) create a reseller authorization that sets the price you're willing to give the reseller.
- The reseller then creates their own private offer to the end customer, using your authorization as the basis — at whatever markup they choose.
- The end customer buys from the reseller through the marketplace, and billing flows through accordingly.
:::info
A reseller authorization is not sent to an end customer — it is sent to the reseller. Make sure the deal you create it from is associated with a reseller, not the end customer.
:::
For more details, see [Channel Partner Private Offers (CPPO)](/aws-marketplace/cppo/).
## Prerequisites
- The Suger App must be set up in HubSpot and the Suger app card must be visible on your deal pages. If you haven't done that yet, see [Set up the Suger App in HubSpot](/hubspot-app/hubspot-app-configuration/).
- The product you want to authorize must already exist in Suger. If it doesn't, create it in the Suger Console first before continuing.
## Create a reseller authorization
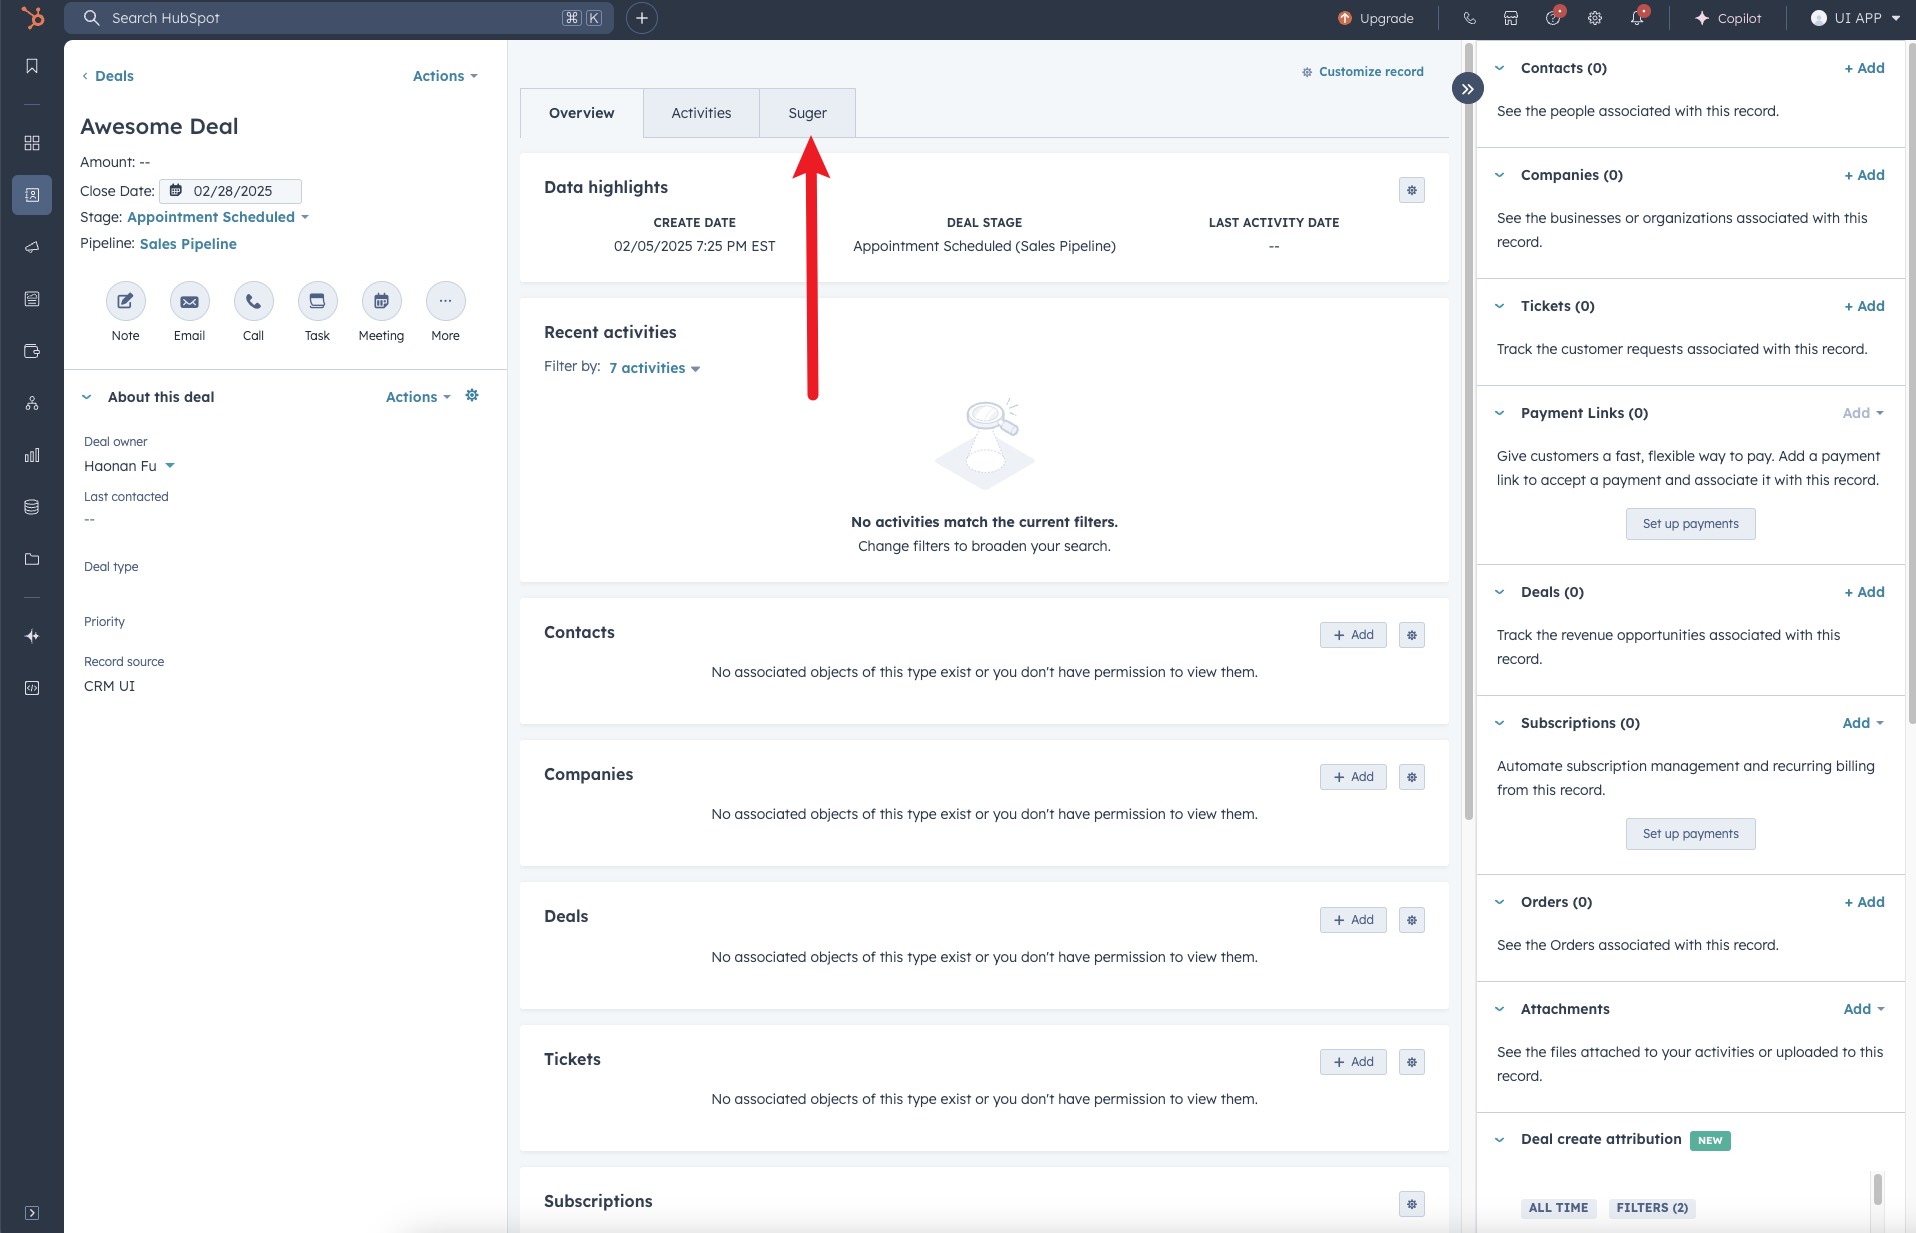
1. Open the HubSpot **Deal** record associated with your reseller, then click the **"Suger"** tab at the top of the deal page.
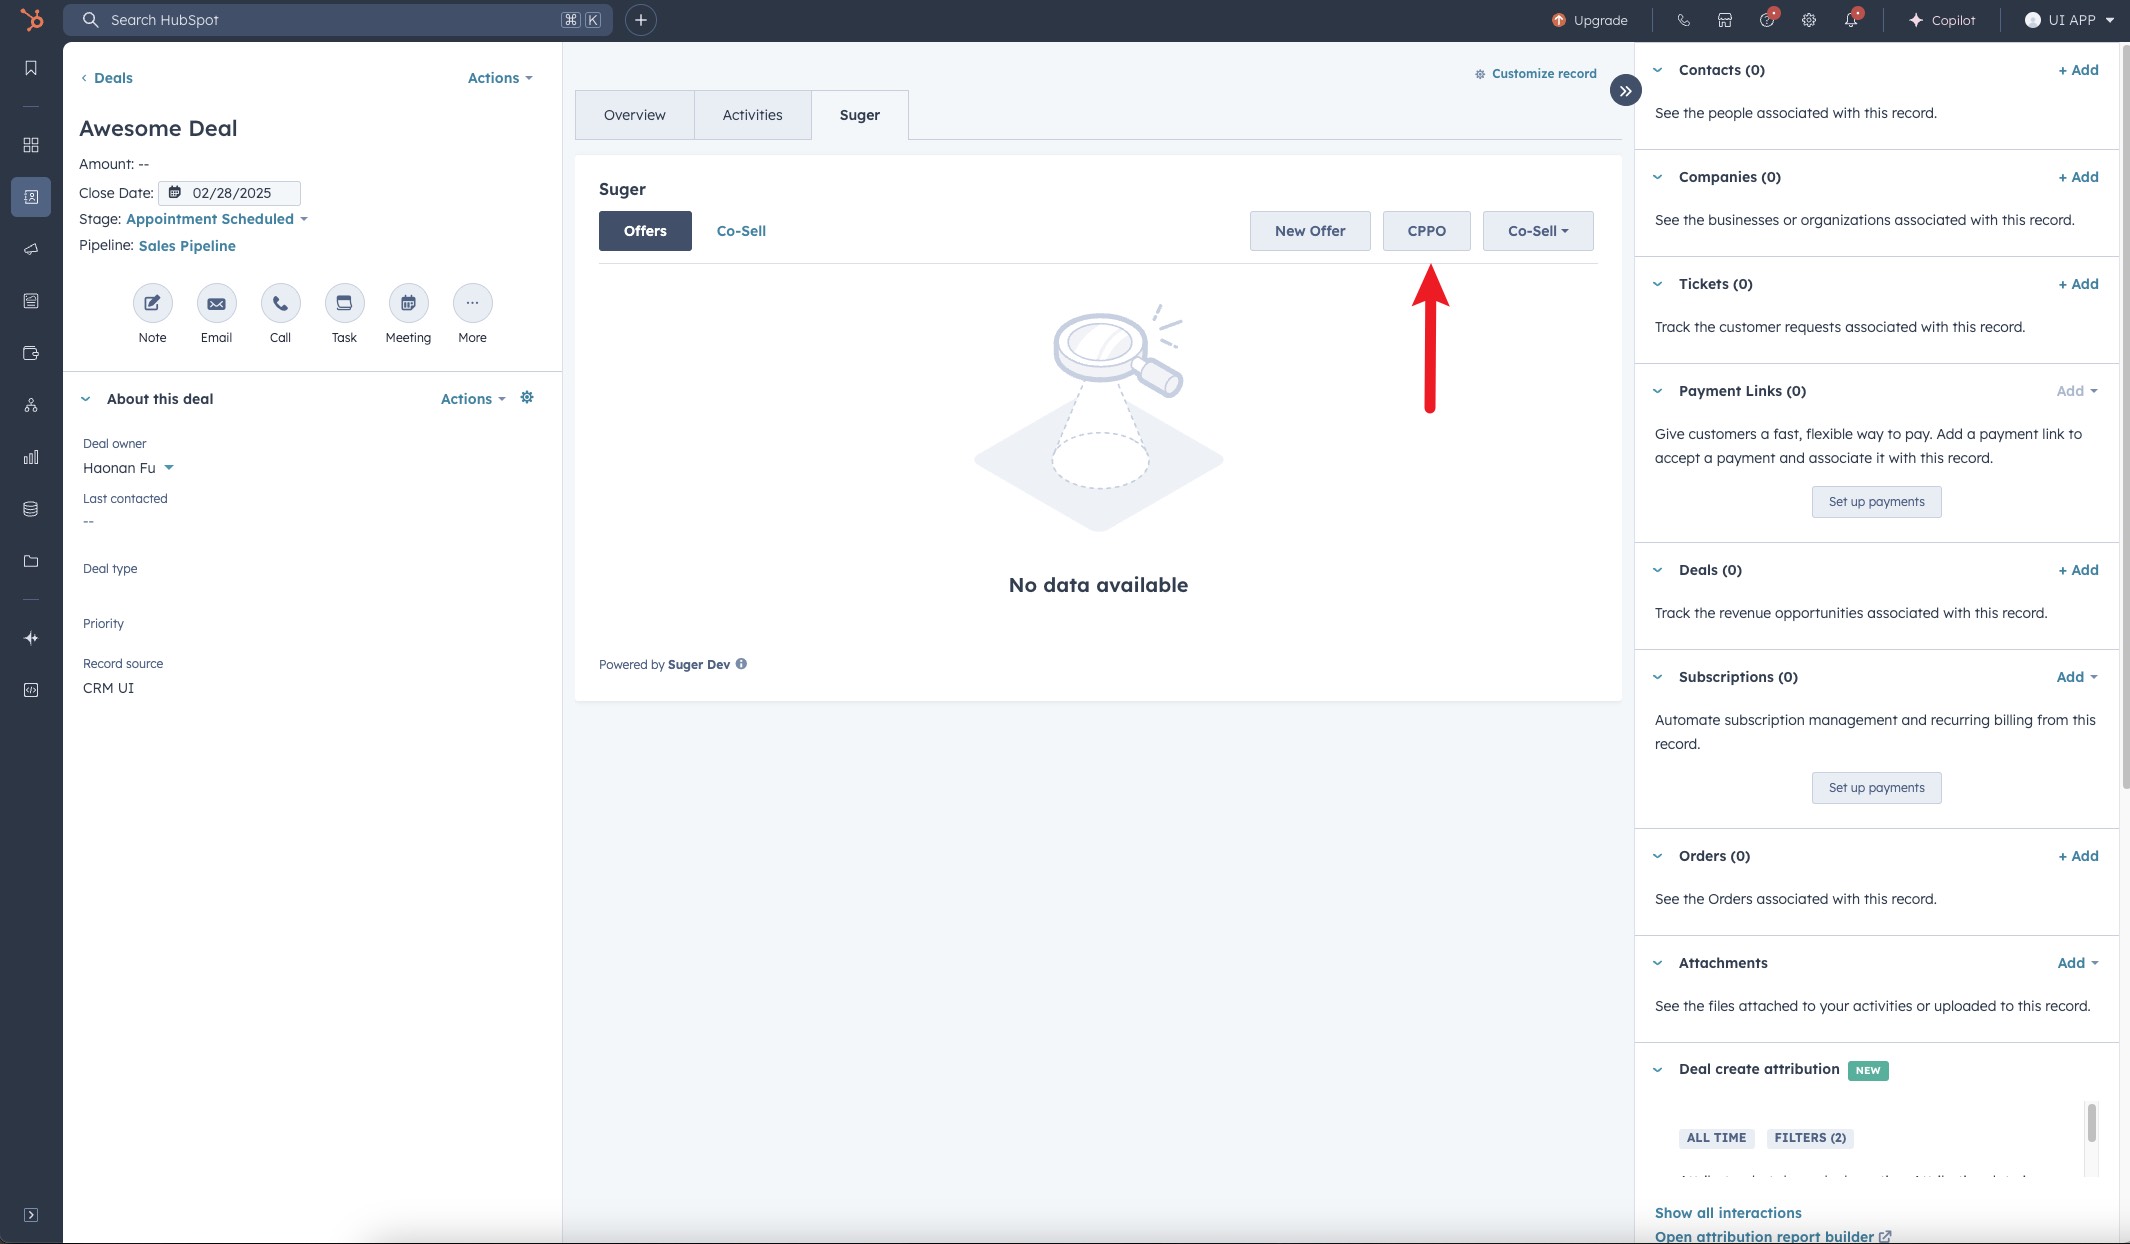
>  2. Locate and click the **"New Resale"** button inside the Suger panel.
>
2. Locate and click the **"New Resale"** button inside the Suger panel.
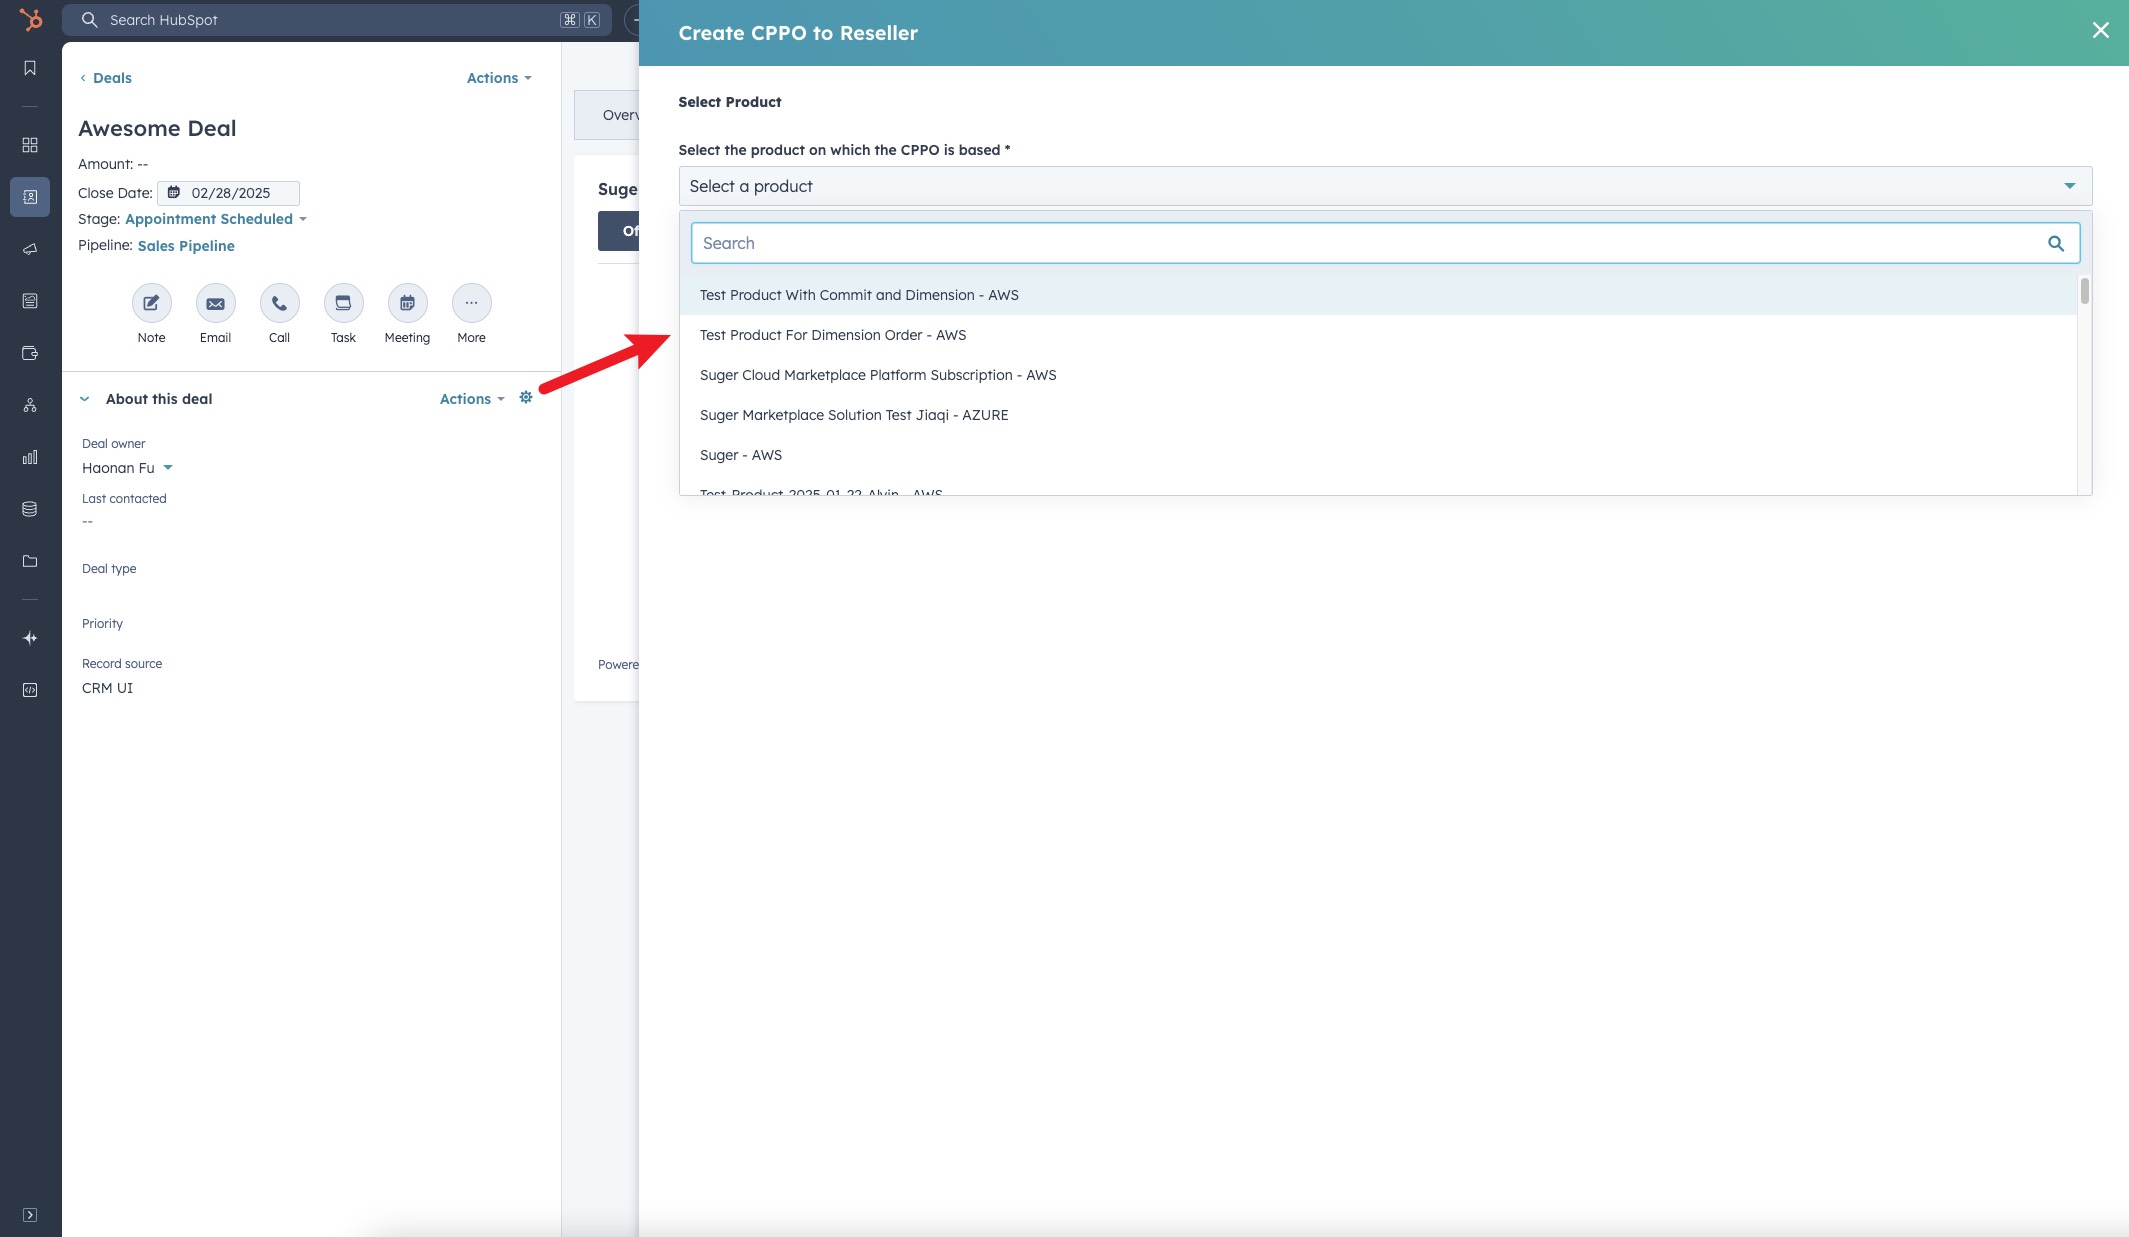
>  3. Under **"Select the product on which the resale authorization is based"**, choose the product. The list shows only products available in your Suger account.
>
3. Under **"Select the product on which the resale authorization is based"**, choose the product. The list shows only products available in your Suger account.
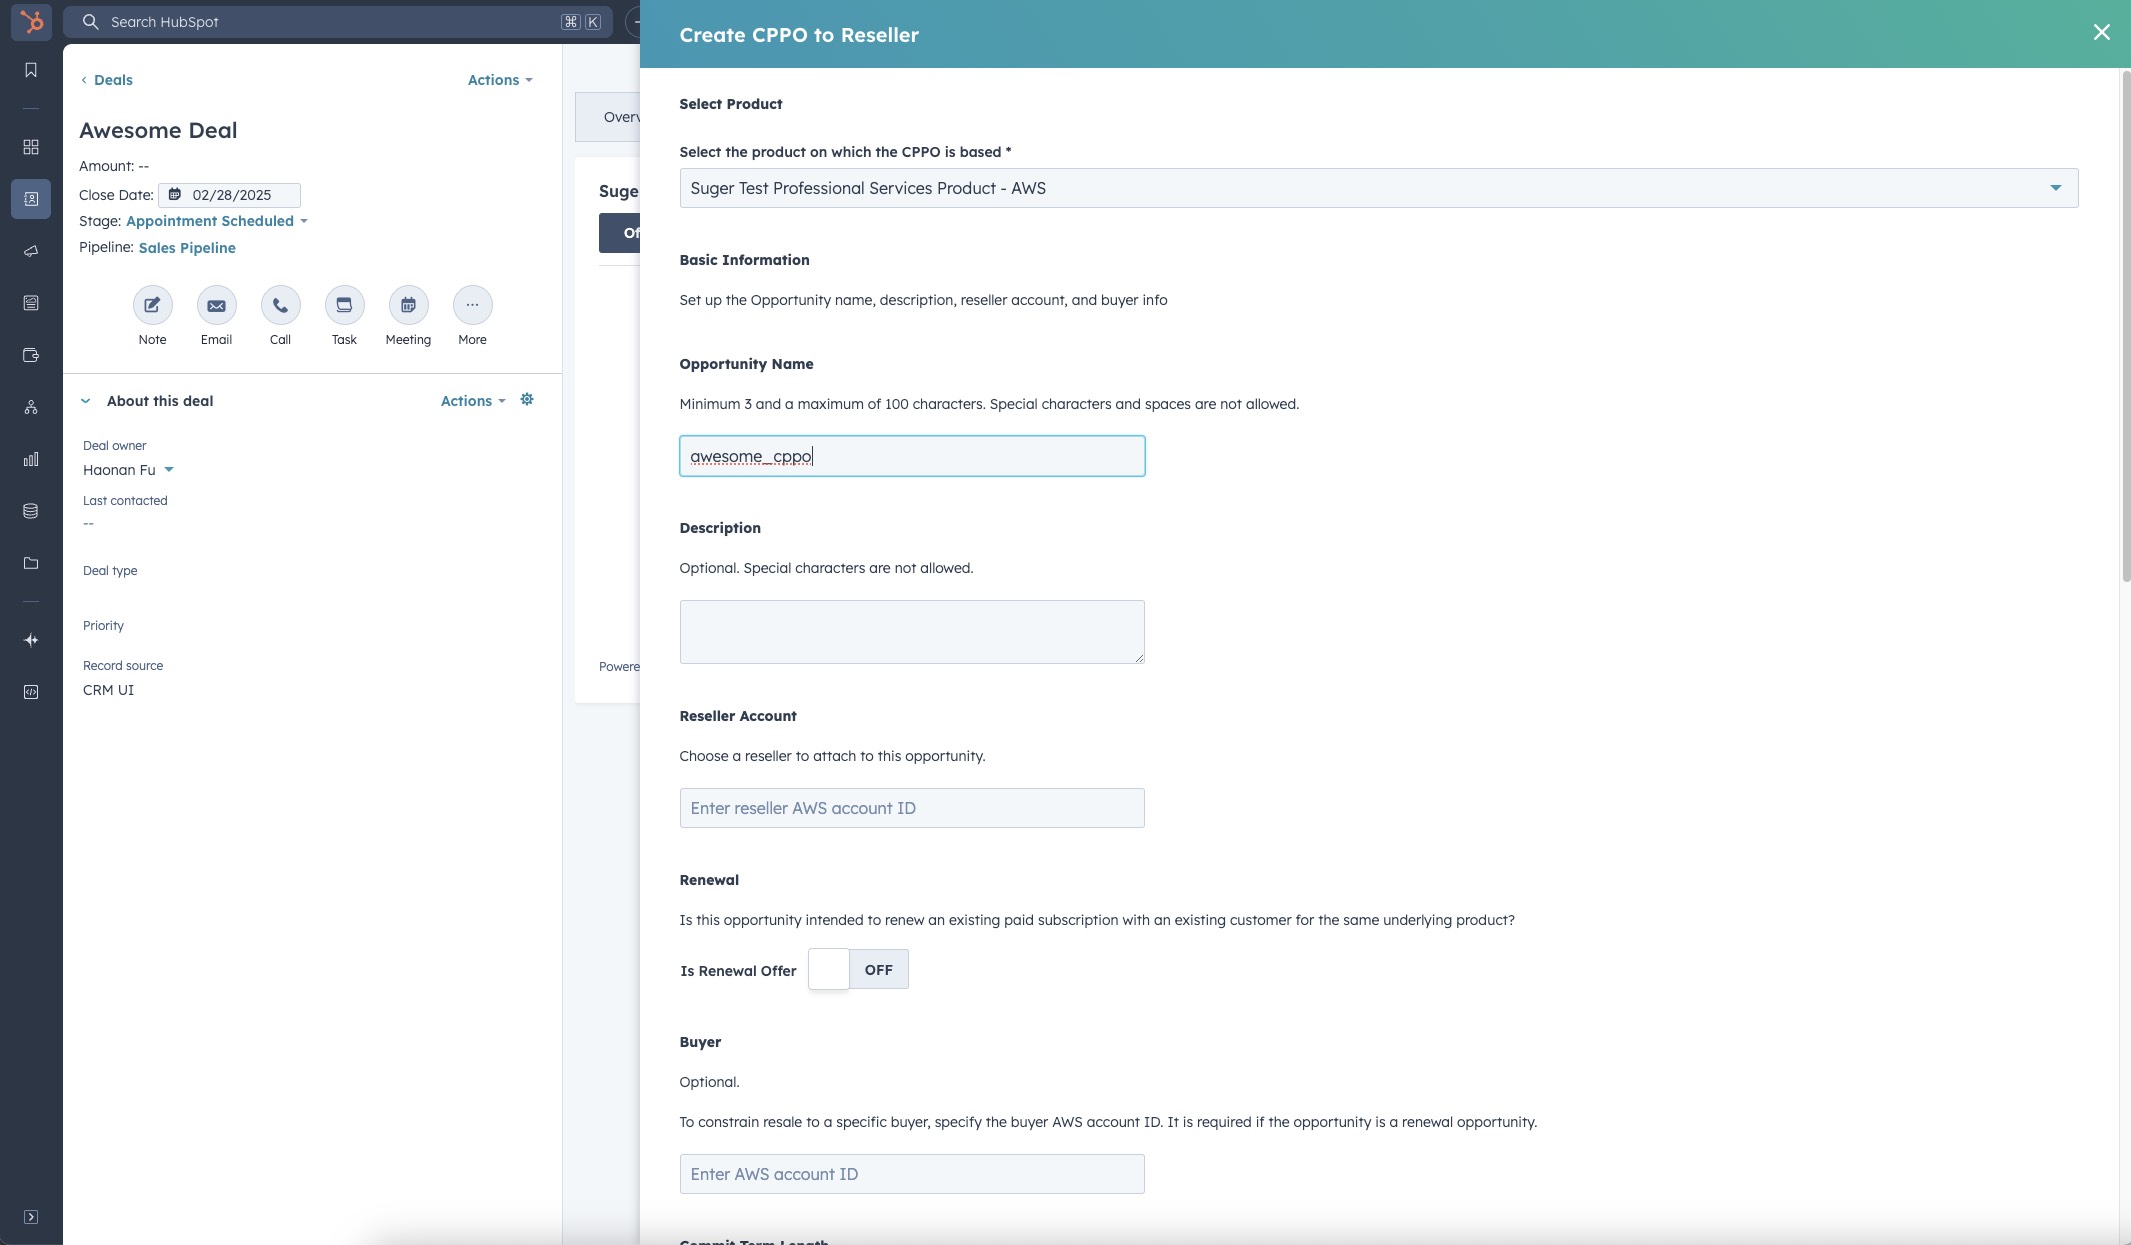
>  4. Complete the required fields in the form. Note that the required fields may vary depending on the cloud marketplace and product type. On AWS, this is where you pick the reseller — see [Choose the reseller account on AWS](#choose-the-reseller-account-on-aws) below.
>
4. Complete the required fields in the form. Note that the required fields may vary depending on the cloud marketplace and product type. On AWS, this is where you pick the reseller — see [Choose the reseller account on AWS](#choose-the-reseller-account-on-aws) below.
>  :::tip
If field mapping has been configured, many fields will be pre-filled from the HubSpot deal automatically — review them for accuracy before submitting.
:::
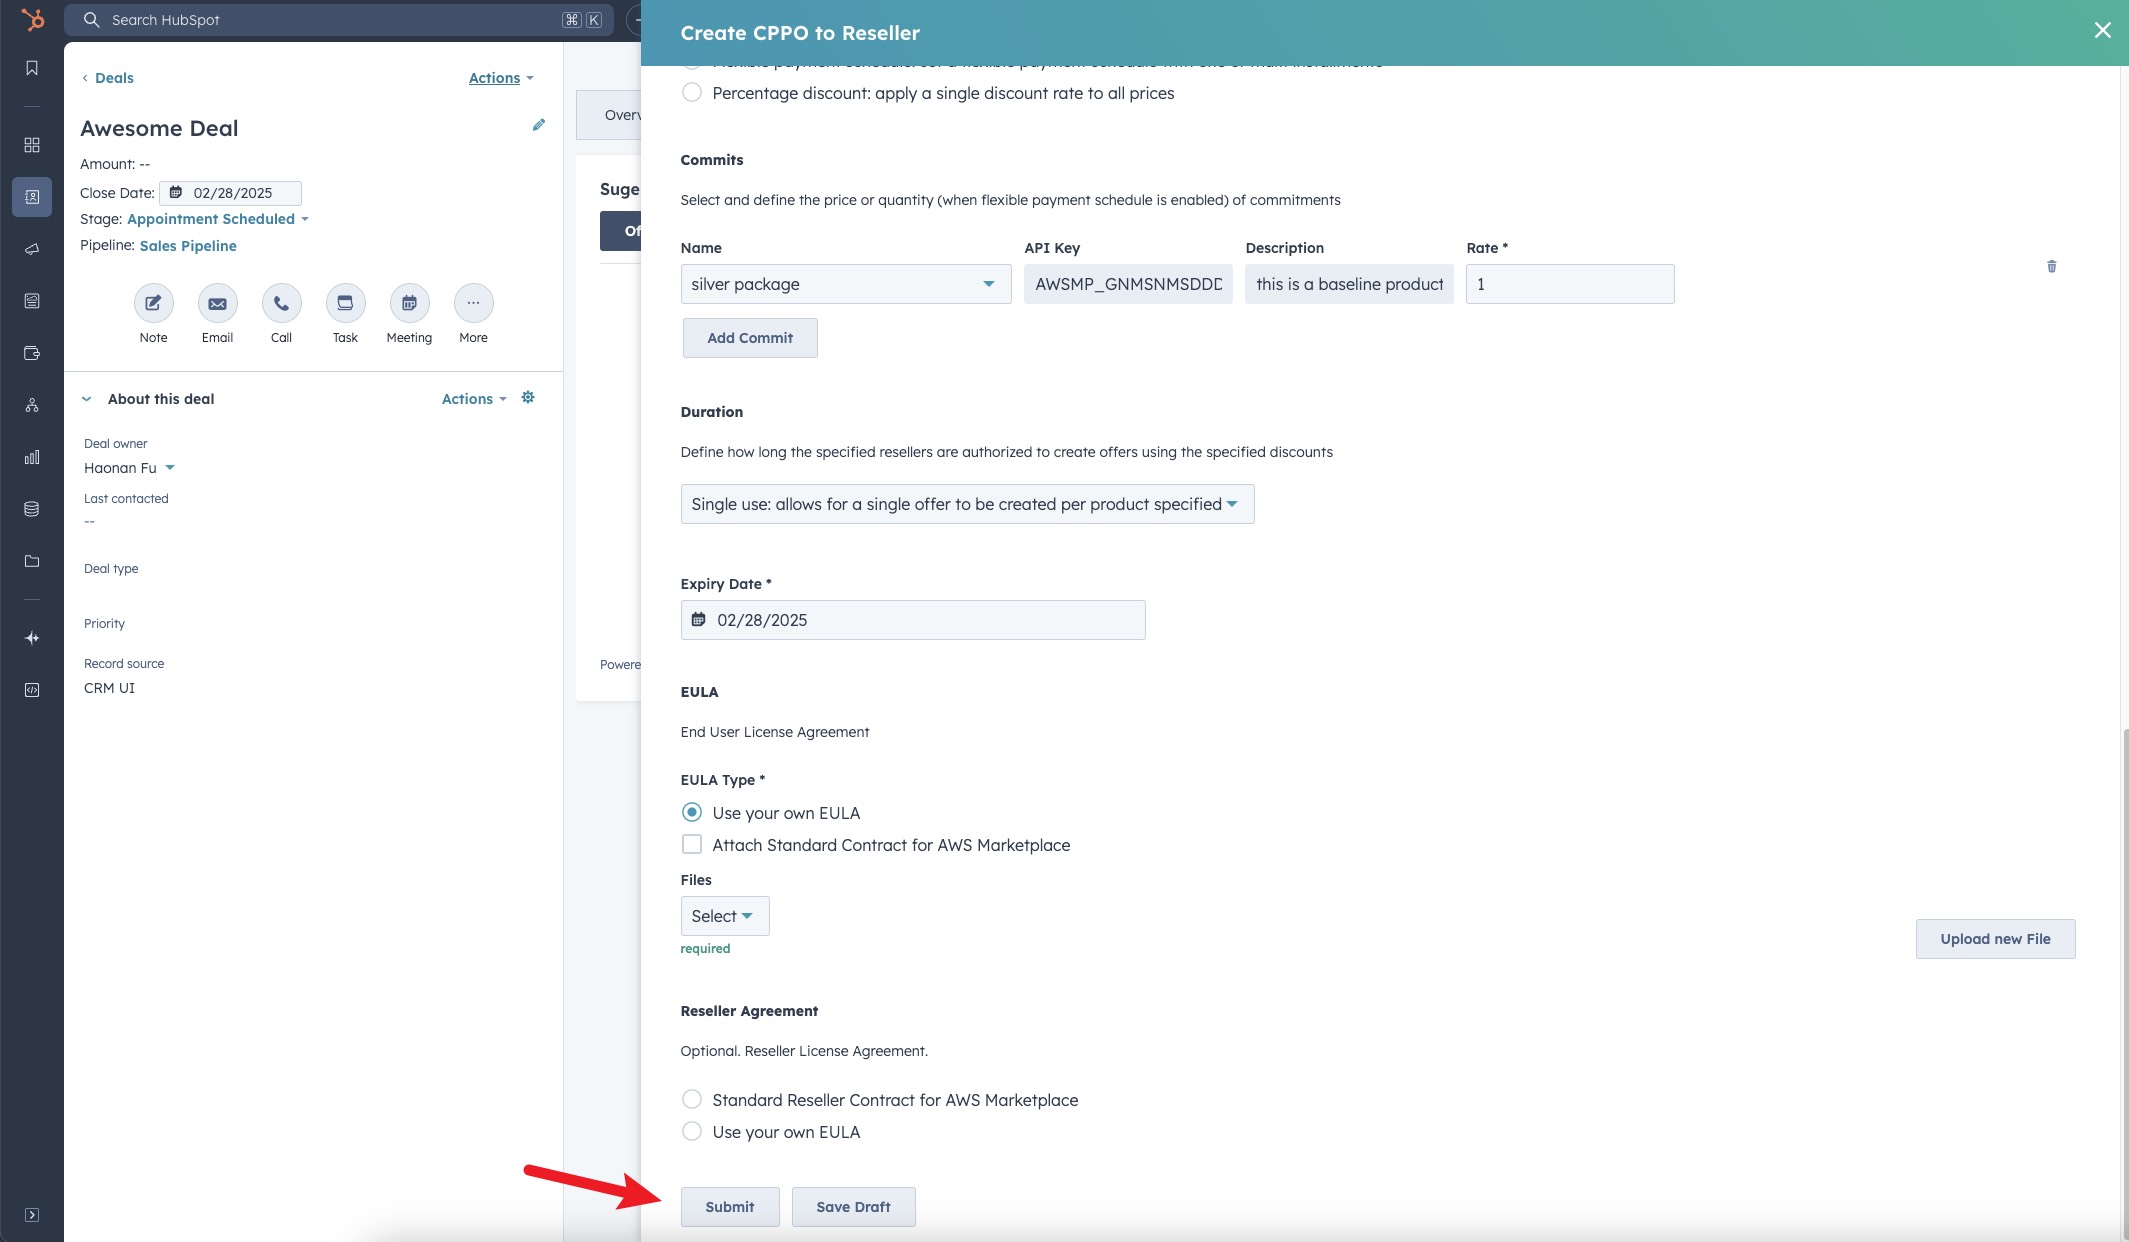
5. Once all necessary information is filled in, submit the form to create the reseller authorization.
>
:::tip
If field mapping has been configured, many fields will be pre-filled from the HubSpot deal automatically — review them for accuracy before submitting.
:::
5. Once all necessary information is filled in, submit the form to create the reseller authorization.
>  6. You are all set!
## Choose the reseller account on AWS
On the AWS resale form, the reseller is picked from a **Reseller Account** field. Suger keeps a crawled list of known AWS reseller accounts, and the field's description tells you how to work it: *"Search by reseller name or 12-digit AWS account ID, then select below."*
1. Type into the **Reseller Account** filter to narrow the list, then pick the reseller from the dropdown underneath it.
2. The dropdown is capped — 100 entries unfiltered, 200 once you start filtering. When there are more matches than that, a line reads *"Showing {n} of {m}. Refine the filter to narrow results."* Keep typing until your reseller appears.
### Add a reseller manually
If the reseller is genuinely not in the list, click **Add reseller manually**. The modal asks for two things:
| Field | Required | Rules |
| --- | --- | --- |
| **AWS account ID** | Yes | Exactly 12 digits. Anything else is rejected with *"AWS account ID must be exactly 12 digits."* |
| **Display name** | No | A label so you can recognize the reseller later. At most 128 characters, otherwise *"Name must be at most 128 characters."* |
Three things to know before you use it:
- **A manual entry wins a collision.** If the account ID you add is also in the crawled AWS list, your entry takes precedence and is listed first — so a careless display name renames that reseller for everyone in your organization.
- **The display name never leaves Suger.** It is local to your organization and is not sent to AWS. AWS only ever sees the account ID.
- **The account is not verified against AWS.** Suger checks the format, not that the account exists or is a valid reseller. A typo produces an authorization pointed at the wrong account.
:::warning
If the panel shows *"The reseller list could not be loaded, so known resellers may be missing. Reopen this panel to retry before adding one manually."*, the dropdown being empty does not mean your reseller is unknown — the list simply failed to load. Close and reopen the panel to retry before adding an account by hand.
:::
## The other way in: Reseller Offer
**New Resale** is the ISV-side action — you authorize a reseller. The reseller side of the same transaction is a **Reseller Offer**, which is one of the three options inside the **New Offer** panel, alongside **Private Offer** and **Amendment Offer**. Use it when you are the reseller creating the final offer to the end customer from an authorization someone granted you. See [Create Offer](/hubspot-app/hubspot-app-offer/).
## What happens next
After you submit the reseller authorization:
- Suger creates the authorization and links it to the HubSpot deal.
- The authorization is sent to the cloud marketplace for processing.
- Once confirmed by the marketplace, the reseller receives access to the authorization and can create their own private offer to the end customer.
- You can track the status of the authorization from the deal record in HubSpot or in the Suger Console under your offers list.
## Troubleshooting common issues
| Issue | Possible cause | Resolution |
| --- | --- | --- |
| No Suger tab visible on the deal page | The Suger app card has not been added to the deal layout | [Set up the Suger App in HubSpot](/hubspot-app/hubspot-app-configuration/) to add the app card |
| No **New Resale** button visible inside the Suger panel | The HubSpot integration connection has been disrupted | Go to Suger Console → **Settings → Integrations → HubSpot** and click **Verify** to re-verify the connection |
| Product list is empty | No products have been set up in Suger | Confirm products exist in the Suger Console before creating a reseller authorization |
| The reseller is not in the **Reseller Account** dropdown | The list is capped, or it failed to load | Type more of the reseller's name or account ID to narrow the capped list. If the "could not be loaded" notice is showing, reopen the panel to retry before adding the account manually |
| Form fields are blank — not pre-filled from the deal | Field mapping has not been configured | Field mapping is an optional admin setup. Contact your admin to configure it |
| Reseller authorization was created but is not visible on the deal | Sync between Suger and HubSpot is delayed | Refresh the page after a few minutes. If it still doesn't appear, confirm the authorization was created in the Suger Console |
## Frequently Asked Questions (FAQs)
**Q: What's the difference between a reseller authorization and a private offer?**
A private offer goes directly to an end customer. A reseller authorization goes to a channel partner (reseller), who then creates their own private offer to the end customer. Use a reseller authorization when you're selling through a partner, not directly to the buyer.
**Q: Does the reseller see my cost price when I create a reseller authorization?**
Yes — the reseller sees the price you set in the authorization. They can then mark it up when creating their own offer to the end customer, but they cannot go below the price you've authorized.
**Q: Can I track whether the reseller has acted on the authorization?**
Yes. You can check the status of the reseller authorization from the deal record in HubSpot or in the Suger Console.
**Q: Will the reseller authorization show up in the Suger Console too?**
Yes. Any reseller authorization created from HubSpot is also visible in the Suger Console under your offers list.
6. You are all set!
## Choose the reseller account on AWS
On the AWS resale form, the reseller is picked from a **Reseller Account** field. Suger keeps a crawled list of known AWS reseller accounts, and the field's description tells you how to work it: *"Search by reseller name or 12-digit AWS account ID, then select below."*
1. Type into the **Reseller Account** filter to narrow the list, then pick the reseller from the dropdown underneath it.
2. The dropdown is capped — 100 entries unfiltered, 200 once you start filtering. When there are more matches than that, a line reads *"Showing {n} of {m}. Refine the filter to narrow results."* Keep typing until your reseller appears.
### Add a reseller manually
If the reseller is genuinely not in the list, click **Add reseller manually**. The modal asks for two things:
| Field | Required | Rules |
| --- | --- | --- |
| **AWS account ID** | Yes | Exactly 12 digits. Anything else is rejected with *"AWS account ID must be exactly 12 digits."* |
| **Display name** | No | A label so you can recognize the reseller later. At most 128 characters, otherwise *"Name must be at most 128 characters."* |
Three things to know before you use it:
- **A manual entry wins a collision.** If the account ID you add is also in the crawled AWS list, your entry takes precedence and is listed first — so a careless display name renames that reseller for everyone in your organization.
- **The display name never leaves Suger.** It is local to your organization and is not sent to AWS. AWS only ever sees the account ID.
- **The account is not verified against AWS.** Suger checks the format, not that the account exists or is a valid reseller. A typo produces an authorization pointed at the wrong account.
:::warning
If the panel shows *"The reseller list could not be loaded, so known resellers may be missing. Reopen this panel to retry before adding one manually."*, the dropdown being empty does not mean your reseller is unknown — the list simply failed to load. Close and reopen the panel to retry before adding an account by hand.
:::
## The other way in: Reseller Offer
**New Resale** is the ISV-side action — you authorize a reseller. The reseller side of the same transaction is a **Reseller Offer**, which is one of the three options inside the **New Offer** panel, alongside **Private Offer** and **Amendment Offer**. Use it when you are the reseller creating the final offer to the end customer from an authorization someone granted you. See [Create Offer](/hubspot-app/hubspot-app-offer/).
## What happens next
After you submit the reseller authorization:
- Suger creates the authorization and links it to the HubSpot deal.
- The authorization is sent to the cloud marketplace for processing.
- Once confirmed by the marketplace, the reseller receives access to the authorization and can create their own private offer to the end customer.
- You can track the status of the authorization from the deal record in HubSpot or in the Suger Console under your offers list.
## Troubleshooting common issues
| Issue | Possible cause | Resolution |
| --- | --- | --- |
| No Suger tab visible on the deal page | The Suger app card has not been added to the deal layout | [Set up the Suger App in HubSpot](/hubspot-app/hubspot-app-configuration/) to add the app card |
| No **New Resale** button visible inside the Suger panel | The HubSpot integration connection has been disrupted | Go to Suger Console → **Settings → Integrations → HubSpot** and click **Verify** to re-verify the connection |
| Product list is empty | No products have been set up in Suger | Confirm products exist in the Suger Console before creating a reseller authorization |
| The reseller is not in the **Reseller Account** dropdown | The list is capped, or it failed to load | Type more of the reseller's name or account ID to narrow the capped list. If the "could not be loaded" notice is showing, reopen the panel to retry before adding the account manually |
| Form fields are blank — not pre-filled from the deal | Field mapping has not been configured | Field mapping is an optional admin setup. Contact your admin to configure it |
| Reseller authorization was created but is not visible on the deal | Sync between Suger and HubSpot is delayed | Refresh the page after a few minutes. If it still doesn't appear, confirm the authorization was created in the Suger Console |
## Frequently Asked Questions (FAQs)
**Q: What's the difference between a reseller authorization and a private offer?**
A private offer goes directly to an end customer. A reseller authorization goes to a channel partner (reseller), who then creates their own private offer to the end customer. Use a reseller authorization when you're selling through a partner, not directly to the buyer.
**Q: Does the reseller see my cost price when I create a reseller authorization?**
Yes — the reseller sees the price you set in the authorization. They can then mark it up when creating their own offer to the end customer, but they cannot go below the price you've authorized.
**Q: Can I track whether the reseller has acted on the authorization?**
Yes. You can check the status of the reseller authorization from the deal record in HubSpot or in the Suger Console.
**Q: Will the reseller authorization show up in the Suger Console too?**
Yes. Any reseller authorization created from HubSpot is also visible in the Suger Console under your offers list.